
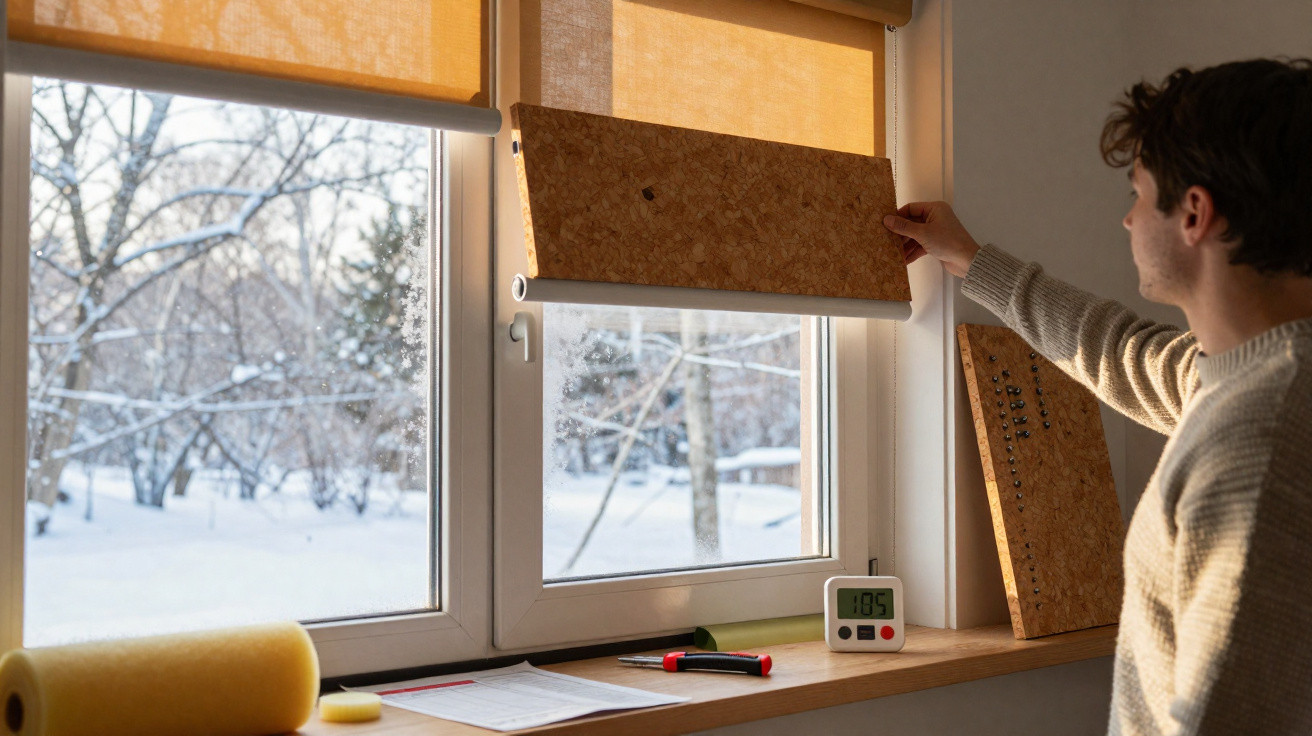
If you feel a cold draught by the window in winter even with the heating turned up, you will probably suspect poor glazing or leaky frames. In a great many cases, however, the cold is coming from somewhere else: the roller shutter box. A few targeted measures and inexpensive materials can significantly improve this weak point – and energy experts say savings of up to 20 per cent in heating energy consumption may be possible.
Why the roller shutter box becomes a hidden thermal bridge
Roller shutters are generally a worthwhile addition: they offer burglary protection, reduce noise and improve thermal insulation at the window. Yet the issue is often not the shutter curtain itself, but the box in which its slats are wound up.
In many older properties, this box is made from thin timber or plastic panels with little meaningful insulation. In some cases, just a few millimetres of material separate the indoor space from the outside air. Cold air can then enter the living area directly through joints, gaps and poorly fitting access panels.
“A leaky roller shutter box acts like a small window that is permanently open – invisible, but noticeable on the heating bill.”
Professionals refer to this as a “thermal bridge”: cold outdoor air cools the box and the adjoining building elements. The heating system then has to work harder to maintain the desired room temperature. Anyone with several such boxes in their home will notice the difference clearly, both in comfort and on their bill.
How much energy better insulation can save
The effect of one roller shutter box may appear minor at first. Taken together, though, they create a considerable area through which heat can escape. Energy suppliers and refurbishment specialists estimate that targeted insulation of roller shutter boxes can deliver savings of up to one fifth of heating energy, particularly in unrenovated older homes.
- less draught around the window
- more even room temperatures
- noticeably lower heating demand
- improved protection against outside noise
The benefit is that this work does not require anyone to open up walls or fit new windows. Existing boxes can be upgraded with a manageable amount of effort – usually in one afternoon.
Step by step: how to insulate a roller shutter box yourself
Safety first: raise the roller shutter and isolate the electricity
Before starting, raise the roller shutter fully so that the shutter curtain is inside the box. With electrically operated shutters, then remove the fuse or switch off the relevant circuit breaker. This prevents the motor from moving while you are working.
Open the box and check the available space
Depending on its construction, the inspection panel can either be unscrewed or unclipped. Work carefully so that the cover does not crack. Next, measure the distance between the shaft around which the roller shutter winds and the inside walls of the box.
In many cases, space is limited, meaning a thick insulation block will not fit. This is precisely why accurate measurements are worthwhile before purchasing materials. It is equally important to clean the inner surfaces with a dry cloth or a vacuum cleaner attachment, ensuring that adhesive and insulation boards will bond properly later.
Which insulation materials are suitable for roller shutter boxes
Several options are available in shops that are specifically designed, or at least particularly well suited, for insulating roller shutter boxes. They vary in cost, installation effort and additional benefits such as sound insulation.
Natural option: cork boards
Expanded cork is considered a sustainable choice. It is made from cork oak bark and pressed into boards of varying densities. This means insulation can be fitted even where space is restricted, substantially slowing down cold transfer.
- good thermal protection despite a slim thickness
- natural, moisture-resistant material
- easy to cut and bond in place
The classic choice: stone wool for narrow boxes
Stone wool, often sold as “mineral wool” in DIY shops, is made from melted rock. It provides good value for money, is non-combustible and copes with moisture better than many other insulation materials. Boards between 2 and 5 centimetres thick are generally sufficient for roller shutter boxes.
Anyone choosing this option should use the wool in the form of rigid boards or mats. Loose fibres are impractical in the confined box area and may irritate the skin while you work. Gloves and long clothing are sensible.
For greater quiet: acoustic insulating foam
On noisy roads or near railway lines, it is worth considering specialist foams designed to dampen vibrations and sound. These materials combine thermal insulation with noise reduction. They are usually sold as boards or mats that can be cut to size and glued into position.
Purpose-made systems for roller shutter boxes
Manufacturers now offer insulation kits developed specifically for roller shutter boxes. These commonly include pre-shaped foam boards with grooves and cut-outs, allowing them to adapt neatly to the shaft and the box walls.
“For people with little DIY experience, pre-prepared insulation kits are often the most convenient option: minimal cutting, clear instructions and suitable adhesives.”
Such systems are often found in the windows and doors section of DIY shops. They frequently include:
- rigid foam boards that are easy to cut
- suitable installation adhesive, often neoprene-based
- sealing profiles or silicone strips for joints
Important: the boards must not obstruct the shaft. Always leave a little clearance during fitting so that the roller shutter can move up and down freely afterwards.
Seals are usually essential
Even the best insulation material loses its effect if the box cover does not close tightly. Small gaps are enough to create a noticeable draught. Silicone or rubber seals close these joints reliably.
How to seal the box properly
- Check the line of the joints around the inspection panel.
- Remove old, brittle seals and clean away adhesive residue.
- Trim the new sealing profiles to size, then stick or press them into place.
- Close the panel and check that it sits firmly against the frame.
Where sealing strips are unsuitable, a high-quality silicone sealant can be used instead. It works well for closing narrow gaps where the box meets the wall. Take care not to block any ventilation openings provided by the manufacturer.
What these measures achieve in everyday life
Many residents notice the change only a few hours after sealing: the familiar streams of cold air around the window disappear, and the room air feels more consistent. Radiators no longer need to be turned up as high to provide the same level of comfort.
People who treat several roller shutter boxes in a house often notice:
- noticeably fewer draughts in seating and sleeping areas
- smaller temperature differences between the window area and the middle of the room
- less condensation on the glass because the surface cools down less
This work is especially worthwhile in older properties with uninsulated external walls. Roller shutter boxes there are often poorly constructed, so every improvement has a direct effect on how the room feels.
Practical advice and possible pitfalls
Not every box has the same construction. On very old models, access is sometimes located outside on the façade. Anyone who feels unsure when using a ladder should call in a specialist contractor. The same applies if the box is difficult to open or the drive mechanism appears complicated.
In rented homes, the owner’s consent is generally needed before making permanent alterations. A brief message pointing out the potential heating-cost savings can sometimes persuade landlords more quickly than expected.
One point that is often underestimated is ventilation. Anyone sealing every draught in their home must ventilate more consciously so that moisture can escape. Regular short, intensive ventilation helps prevent mould and continues to provide a pleasant indoor climate.
Why it pays to focus on small details
Major refurbishment projects, such as new windows or an insulated façade, are expensive and time-consuming. Roller shutter boxes are among the building elements where relatively small interventions can bring a surprisingly substantial benefit. Many material kits cost less than a single monthly heating payment and remain effective for years.
Anyone improving the energy efficiency of their home step by step will often be best served by starting with these “mini projects”. Roller shutter boxes, radiator recesses and gaps around doors all work together. If each of these areas is improved a little, energy demand falls significantly, and the home finally feels as warm in winter as the thermostat promises.





Comments
No comments yet. Be the first to comment!
Leave a Comment