
The loft hatch lifts with a gentle crack, and that unmistakable attic scent drifts down: dust, dry timber, and a faint trace of old Christmas decorations. You lean up through the opening, half-expecting… what, exactly? Insulation piled everywhere, something modern, something “enough”.
What you find instead is a skim of thin, uneven yellow batts and a few lumpy heaps someone dumped years back. In patches, the joists are almost exposed, like bones. Your heating costs have been creeping up for ages; the bedroom is icy in winter and stifling in July, and you’ve been blaming the weather. But up here the real reason is laid out in front of you, nearly taunting you. The depth that ought to be there… simply isn’t.
You suddenly understand that the biggest leak in your home isn’t a window at all. It’s right above your head.
The hidden shortfall above most pre‑1990 ceilings
Step into almost any property built before 1990 and you’ll hear a familiar pattern. The house feels a touch draughty in January and a bit clammy in August, but not so bad that it screams “disaster”. Then you climb into the loft and spot 50–75 mm of insulation, perhaps 100 mm if you’re fortunate. At the time, that wasn’t penny-pinching; it was normal. Standards were different.
Current guidance in the UK (and in many US states) points to a very different baseline: roughly 270–300 mm of loft insulation for a modern standard-about the equivalent of R‑38. That’s around three times what plenty of older homes still have. Most pre‑1990 attics are sitting at about a third of modern expectations, letting heat escape season after season.
On a cold evening, you notice the missing depth even without seeing it. The boiler fires more often. The thermostat struggles to settle at the temperature you’ve chosen. The ceiling gives off a subtle chill that’s hard to explain. That absent 200 mm is the quiet void where your money disappears.
An energy assessor in Leeds has a tale he often shares. He inspected an 1980s semi where the owners had already fitted new windows, upgraded the boiler, and even hung heavy curtains. Yet their winter gas bill still hovered near £300 a month. They were ready to blame the supplier-until he went up into the loft.
He found roughly 75 mm of old, compressed glass fibre, dulled by dust and full of gaps around pipework and cabling. In a few places, it barely covered the plasterboard at all. He checked the thickness, took a quick photo, and showed it to the couple. They genuinely believed they had “loads of insulation” because it looked like a generous fluffy layer. No one had ever explained what “enough” actually means in millimetres.
Once they topped it up to 270 mm and sealed the obvious draught routes, their heating demand fell by about a quarter the following winter. No gadgets, no clever controls-just restoring the depth that should have been there all along.
In the 1960s, 70s, and even the 80s, regulations tended to prioritise keeping build costs sensible rather than squeezing every last kilowatt-hour out of a home. Energy was cheaper, climate concerns were less prominent, and lofts were rarely treated as living space. A thin layer of insulation felt like progress. As prices rose and our understanding of heat loss improved, the recommended depth increased. What didn’t increase was the insulation already lying in millions of older roofs.
And insulation rarely performs at its original best forever. Fibreglass can settle and compact. Tradespeople may shift it to run cables or pipes and never reinstate it properly. So the 100 mm you think you’ve got can behave more like 60 mm in places. Even when homeowners feel they’re close to “fine”, they’re usually still a long way from the 270–300 mm range modern guidance recommends.
How to work out what’s actually above your ceiling
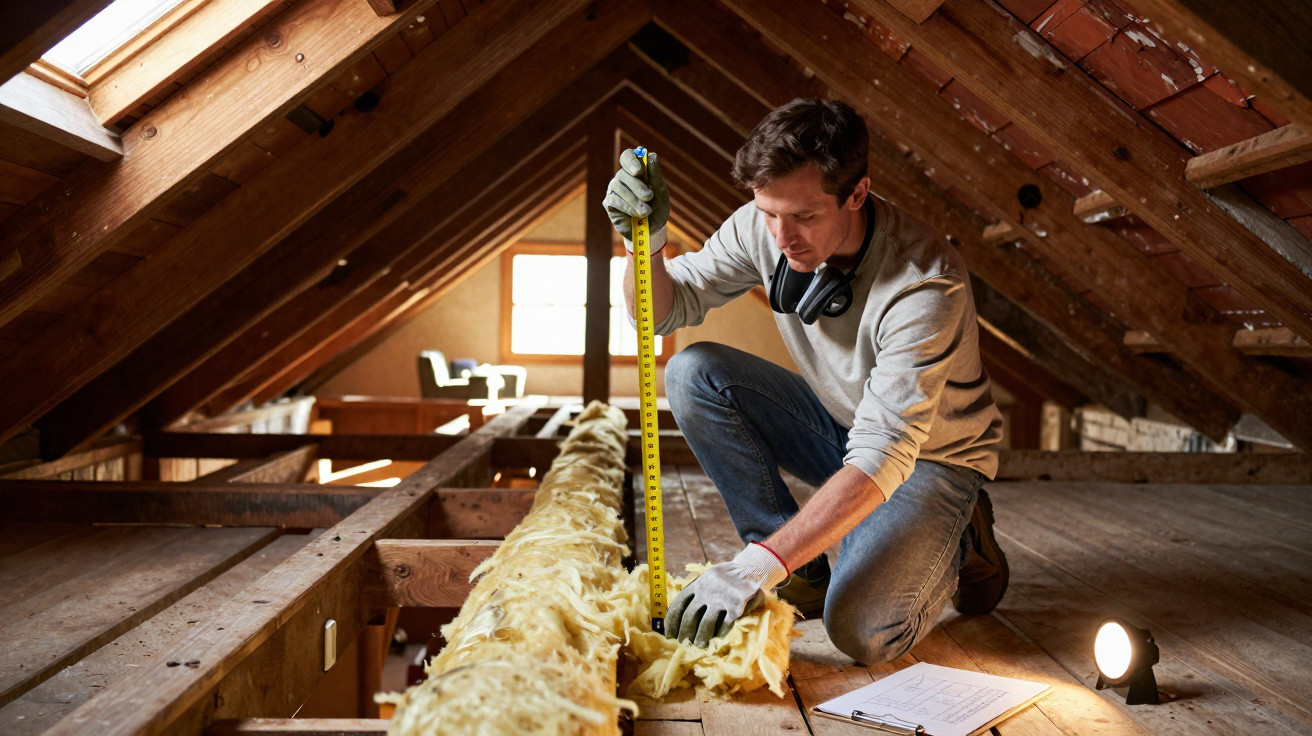
The most straightforward check needs only a tape measure-and a bit of candour. Choose a dry day, grab a bright torch, and go into the loft. Find an area that looks representative (not the thinnest corner and not the thickest pile). With a gloved hand, gently part the insulation and measure from the top of the ceiling joist up to the top surface of the insulation. That figure is your real depth. As a quick guide, if the insulation only just hides the joists, you’re likely at 100 mm or less.
If the joists stand proud like rails on a train track, that’s another sign you’re short. In a properly insulated loft today, the joists are often close to buried, with an additional layer laid across them. That’s the finish you’re aiming for: an unbroken, even blanket rather than a patchwork quilt. Anything under about 200 mm in a cold roof loft is a red flag in a pre‑1990 home.
This is usually the point where people start to wince. They remember hauling a box of decorations across the loft and flattening a strip of insulation without a second thought. Or they recall an electrician leaving tracks through the fluff like a snowplough. Those marks matter. Heat pours out through every thin section, each exposed joist, and every uninsulated hatch. The goal isn’t only depth-it’s consistent depth across the whole loft. Even coverage can turn a house that feels unpredictable into one that stays steady.
Let’s be honest: hardly anyone checks loft insulation regularly. Nobody gets up and thinks, “Today I’ll lovingly inspect my loft insulation.” Most people head up there only when something goes wrong-a leak, a wiring problem, a strange noise. That’s exactly why so many homes remain stuck around 100 mm. From the sofa, the shortfall is invisible-until the bill arrives or your teenager complains their room feels like a walk-in fridge.
The upside is that increasing from 100 mm to 270–300 mm is one of the best-value improvements you can make. In many UK homes, it’s one of those rare upgrades that can repay itself within a handful of winters rather than a decade. The missing 170–200 mm is where a lot of the real savings sit. It isn’t glamorous or Instagrammable-just effective.
The smart way to increase loft insulation depth in an older home
If the loft is primarily for storage rather than living space, the usual method is to build up insulation in two layers. Start by leaving the existing material in place provided it’s dry and free from mould. Then fit new rolls between the joists so that first layer totals around 100–150 mm. After that, lay a second layer across the joists at right angles, taking the total to roughly 270–300 mm. That cross layer reduces thermal bridging through the timber.
Don’t ignore the hatch. A well-insulated loft paired with a thin, bare hatch is like wearing a coat with a hole in the back. Fixing a piece of rigid foam to the top of the hatch, plus adding draught-proofing around the edges, can deal with that weak point quickly. And if you still store items up there, think about raised platforms or loft legs so you’re not compressing the new insulation every time you push a suitcase around.
The same mistakes crop up again and again. People pack insulation tight against older downlights that were never designed for contact, creating an overheating risk. Others block soffit vents at the eaves while trying to “seal” the house, trapping moisture where it shouldn’t be. Some then stack heavy boxes straight onto the joists, crushing 270 mm of carefully laid insulation back down to 80 mm in a single season.
There’s often an emotional element too: a quiet sense of guilt. Most of us have had that moment of thinking “I’ll deal with it later” while closing the loft hatch. You know it isn’t quite right, but life is busy, and energy prices can feel like something you can’t fully influence. That’s why a simple one-day top-up job can feel oddly empowering. You’re directly changing how your house holds heat. That’s real.
“The most common phrase I hear in old lofts is, ‘I thought this was fine,’” says one veteran surveyor. “People don’t realise they’re living with 1980s standards in a 2020s energy world.”
- Target depth: Aim for around 270–300 mm total loft insulation in a cold roof.
- Check first: Before adding more, look for damp, mould, or signs of pests.
- Stay safe: Use crawl boards and good lighting, and take care around older wiring.
- Think airflow: Keep eaves vents clear so the roof space can breathe.
- Get help if needed: A home energy survey or professional installer can spot problems you might miss.
The depth above your head, and the life happening below it
There’s something almost symbolic about the thin layer of insulation sitting over so many older properties. Downstairs, life is moving at speed: children growing up, jobs shifting, the usual arguments about the thermostat. Over it all, a shallow blanket from a different era tries-and struggles-to meet modern expectations. The gap isn’t only technical; it feels generational.
Add that missing 170–200 mm and you’re doing more than shaving a bill. You change winter mornings, how long a room stays warm after the heating clicks off, and the quiet confidence that the next statement might not sting quite as much. These are small, everyday wins-but they’re still wins. And they add up, home by home, street by street.
Your loft can also spark a wider conversation. Once you’ve seen your own joists peeking through, you start asking neighbours what theirs looks like. You compare notes with parents in a 1970s bungalow, or a friend renting a 1985 flat. Suddenly, the supposedly dull question-“How much insulation is up there?”-turns into a shared mystery you can solve together.
Homes built before 1990 often have plenty going for them: solid construction, generous room sizes, and character you don’t always find in new builds. Insufficient loft insulation depth is one of the few shortcomings that’s both common and fixable. Next time you stand beneath the ceiling and notice that faint chill, let your thoughts drift upwards. Above the plaster and paint is a layer that could be thicker, warmer, and gentler on your wallet.
And the surprising part? You’re only one tape measure, one decision, and a few rolls of insulation away from closing a gap that’s been quietly open since the day your home was built.
| Key point | Detail | Why it matters to you |
|---|---|---|
| Modern target depth | About 270–300 mm of mineral wool or equivalent (around R‑38) | Helps you judge whether your loft is up to date or badly behind |
| Typical pre‑1990 depth | Often 50–100 mm, sometimes compacted or patchy | Explains why the house cools quickly and costs more to heat |
| Best-value action | Add 170–200 mm and tackle air leaks around the hatch and service penetrations | Lowers bills and improves comfort with a straightforward, accessible job |
FAQ
- How deep should attic insulation be in an older home? For most cold roof lofts in the UK and similar climates, aim for about 270–300 mm of insulation. That aligns with current new-build guidance and offers a strong balance of cost and comfort.
- Is it worth adding more insulation if I already have some? Yes. Moving from 0 to 100 mm makes a difference, but the larger savings often come from topping up the final 150–200 mm-especially in pre‑1990 homes that sit well below modern standards.
- Can I put new insulation on top of the old material? In most cases, yes-provided what’s already there is dry, free of mould, and not infested. If it’s damp or damaged, removing it and starting again is often better than sealing in moisture and odours.
- Will I still be able to use my attic for storage? You can, but you’ll typically need raised decking or loft legs so stored items sit above the full insulation depth, rather than compressing it and reducing performance.
- Do I need a professional, or can I do it myself? Many people can safely DIY a simple loft top-up using crawl boards, gloves, and a mask. If access is awkward, wiring is messy, or ventilation looks questionable, it’s usually safer to bring in a professional.






Comments
No comments yet. Be the first to comment!
Leave a Comment