
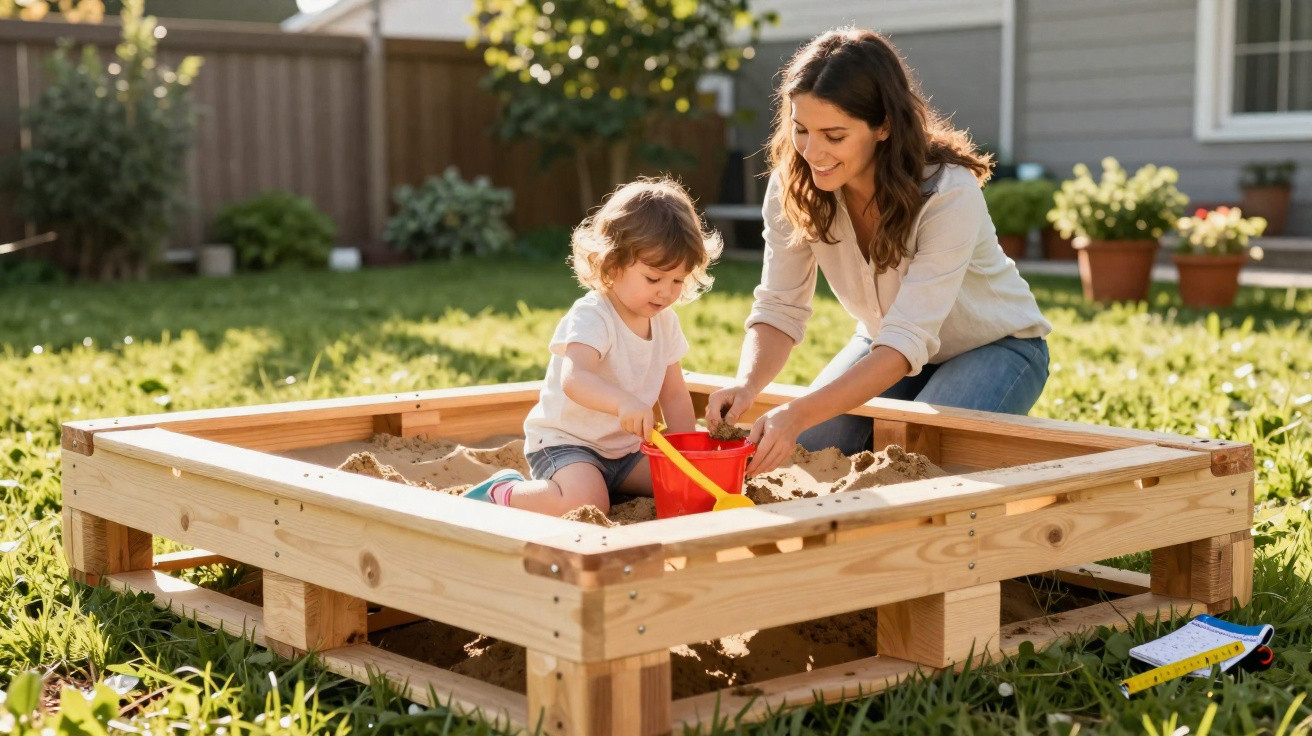
Wooden sandpits look stunning-right up until the price takes the shine off. On a quiet road, a young mum found a smarter option: a safe, solid pallet sandpit made from reclaimed timber, topped with a lid that folds out into benches and set on a base that drains properly after a downpour. Most of us know that feeling when a tiny weekend plan suddenly becomes the best corner of the garden.
Inside, the house carried the mixed scent of fresh coffee and cut wood. Out by the fence, a stack of scuffed pallets leaned together like worn-out workhorses, while two children in wellies darted around them, asking every half a minute whether it was finished yet. Their mum, Hannah, ran her hand along a newly sanded board, narrowed her eyes, then grinned at how smooth it felt-like she’d just discovered a shortcut. A neighbour popped up over the hedge with a tape measure (every street has someone who can’t resist a DIY job). The drill rattled, hinges caught the light, and a low, wide, pleasingly neat box appeared where there had been nothing but grass. The clever bit was hidden beneath a straightforward lid.
Why a pallet sandpit works (and feels right)
Hannah didn’t begin with a detailed plan. She began with what was already to hand: two sturdy pallets, a pile of straight slats, and the gap in the weekend when naps buy you time. The brief was simple-build a shallow frame children can get in and out of without fuss, line it properly, and add a lid that flips back into benches. Shut, it passes for garden seating; open, it becomes a tiny beach. It’s the sort of project you complete and immediately think you should’ve done it last summer.
Cost is a big part of the appeal. A decent timber sandpit can be pricier than a family food shop, and after one soggy week it may still end up rocking and warping. Hannah’s version relied on reclaimed wood and a box of screws. The savings were tangible, and the children weren’t interested in where the boards came from-they only cared that the timber became hills, roads, and imaginary worlds. By some estimates, hundreds of millions of pallets move around the world every year, and far too many are simply thrown away. Rescue one pallet and you keep something useful out of landfill-and gain an afternoon that smells faintly of sun-warmed pine.
Safety sits underneath every choice. Only pallets marked HT (heat-treated) belong anywhere near children; anything painted or chemically treated stays well out of the build. Corners are softened with a sander. Screws are countersunk so little knees don’t catch. A permeable weed membrane inside stops sand disappearing into the soil while still letting rainwater drain away. A proper lid keeps cats out, and the bench panels can even act like a makeshift shade if you drape a sheet over them on very hot days. It isn’t showy. It’s simply practical.
How to build it, step by step
Begin with two heat-treated pallets showing the HT stamp, plus a few extra straight slats. Use a wrecking bar to lift the boards you need, then sand every piece until splinters are a thing of the past. On level ground, assemble a low rectangle, building each side two slats high and fixing the corners with pocket screws or steel corner brackets. Add cross-braces so the frame will comfortably take an adult’s weight. Stretch a weed membrane across the bottom with a touch of slack, staple it to the inside faces, then tip in washed play sand to a depth of 20–25 cm. Finish with a two-part lid on hinges so each half folds back and sits as a bench. That lid is what turns a decent idea into a brilliant one.
The usual mistakes are easy to avoid. Don’t use pallets that are painted, stamped MB, or give off a chemical odour. Drill pilot holes throughout, then come back and round off edges-your shins will appreciate it. Choose washed play sand rather than builders’ sand, which can clump and leave marks. Create a few small drain gaps at the base of each side, just above the membrane, so the box can breathe after rain. If the lawn isn’t level, first make a shallow bed of gravel to improve drainage and stability. Let’s be honest: hardly anyone does that every day-but one careful afternoon now means fewer problems later.
Hannah puts it this way:
“I wanted something safe enough for bare feet, strong enough for muddy friends, and neat enough that I don’t hide it when people pop round.”
After that, it’s just a simple routine to keep everything working nicely:
- Smooth the sand after play so the lid closes flush.
- On bright days, open the lid for an hour to help the sand dry out.
- Rake weekly; top up once a season.
- If the membrane tears, swap it out-it costs pennies and prevents hassle.
- Keep a sieve and a few toys in a crate under one bench flap.
A little box that makes big days
You notice it most around four o’clock, when the sun lands on the lawn and the pace of the day eases. The lid opens like a book; suddenly there’s a harbour, a bakery, a dinosaur excavation. You drink something cold and answer a serious question about tunnels. The noise-spades scraping, children laughing, the soft thud of sand dropping into a bucket-feels like a holiday you didn’t have to organise. Past the thrift and the timber, that’s what a pallet sandpit really gives you: a rhythm, a gathering spot, and a small daily reminder to slow down. It may even kick off the next job-a herb planter from the offcuts, a chalkboard on the fence, weekends where the house becomes a little more “yours”. Someone will ask where you bought it. You’ll smile, and point to the corner of the garden.
| Key point | Detail | Benefit to the reader |
|---|---|---|
| HT-stamped pallets only | Choose heat-treated, unpainted boards; avoid MB-stamped wood | Safer materials near children’s hands and mouths |
| Membrane + drainage | Permeable liner with small side gaps and level base | Dry, clean sand that doesn’t swamp after rain |
| Lid that becomes benches | Two flaps on hinges; countersunk screws; rounded edges | Cat-proof cover, seating, and tidy look in one |
FAQ
- How do I know a pallet is safe for a kid project? Look for the HT stamp on the stringers or blocks. Avoid anything painted, oily, or marked MB. If the smell seems off, don’t use it.
- Where can I find pallets without getting in trouble? Ask small shops, garden centres, and community groups. Many are happy to give pallets away if you collect promptly and leave the area tidy.
- What sand should I use, and how much? Use washed play sand. For a 120 cm by 120 cm box at 20 cm depth, you’ll need roughly 10–12 standard 25 kg bags.
- How do I keep cats and leaves out? Install a two-part lid that closes snugly and add a simple hook or strap. Brush leaves off before opening so they don’t drop into the sand.
- How do I clean or refresh the sand over time? Rake weekly, sift with a garden sieve to remove twigs, and top up each season. Replacing all the sand once a year keeps it looking fresh.



Comments
No comments yet. Be the first to comment!
Leave a Comment