
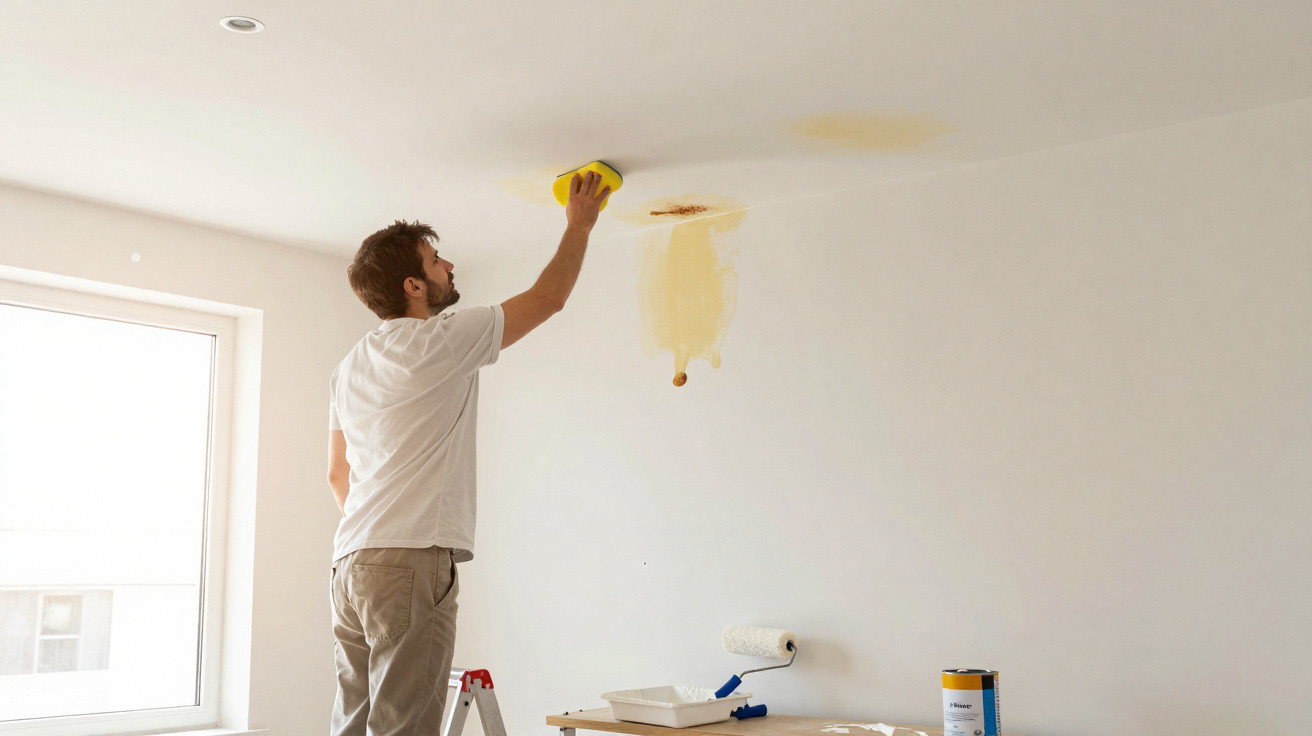
Many homeowners give their ceilings a new coat every autumn, aiming to wipe away years of smoke, cooking residue and damp. Yet the crisp finish often fades fast. When the ceiling discolours again, it usually isn’t a paint failure at all, but a prep step that many DIYers unknowingly miss.
Why your “fresh white” ceiling keeps letting you down
The quick-fix reflex: repainting instead of preparing
It’s easy to treat ceiling paint as a kind of instant cover-up: you spot stains, shadows or greyish areas and roll on a generous layer of white. For a short while, it looks spotless. Then, almost without warning, yellow rings start to show again around the light fitting, above the cooker, or along the perimeter of the room.
That pattern isn’t down to the brand letting you down. It’s because the ceiling is still holding on to what it’s collected over time: smoke from cooking, candles, fires, cigarettes, plus bouts of winter damp.
Ceilings don’t forget: they store grease, nicotine and moisture deep in the surface, then push it back through your new paint.
When you paint directly over that build-up, you’re putting a clean white layer on top of a contaminated one. The usual outcomes are stains that bleed through, paint that bubbles, or a gradual yellowing that seems impossible to prevent.
What paint can’t hide: nicotine, soot and invisible grease
Even the best “high coverage” ceiling paints can only disguise the issue for so long. Nicotine and tar from past smoking can soften and re-dissolve into older coats, then keep travelling upwards. In open-plan homes, airborne grease from cooking spreads through the space and settles on the coolest surface - very often the ceiling. Candle soot and residue from wood burners latch onto tiny flaws in plaster.
If you keep repainting without tackling the underlying film, you trap the contamination and add yet another layer for it to migrate through. Some areas go yellow within days; others creep back as temperatures and humidity shift with the seasons.
If your ceiling yellowed once, it will yellow again unless you change what happens before you open the paint tin.
The simple “sponge test” that tells you if painting is pointless
What your ceiling has really gone through
Instead of focusing on what you’ve just done with a roller, think back over the past five years in that room. Has it been exposed to:
- Regular frying or grilling without a powerful cooker hood
- Slow-burning candles or incense most evenings
- A wood stove or open fireplace nearby
- Smoking, even if it stopped years ago
- Episodes of condensation, leaks or damp patches
All of these send moisture and particles upwards. Over time the ceiling absorbs them, layer by layer. By the time it looks tired, the cause is often embedded rather than just sitting on the surface.
How to check if your ceiling needs degreasing first
You can do a quick check in under two minutes. Use a clean, pale-coloured sponge or cloth. Wet it with warm water, then wring it out thoroughly. Lightly wipe a 20–30 cm patch of ceiling near the kitchen, by a vent, or around a pendant light.
| What you see on the sponge | What it usually means |
|---|---|
| Almost nothing, just dust | Normal dirt: light cleaning and a good primer should be enough |
| Yellow or brown stains | Nicotine, cooking fumes or old soot migrating through layers |
| Greasy grey film, slightly slippery | Cooking grease build-up needing an alkaline degreaser |
| Dark streaks or black dust | Soot deposits from candles, burners or a chimney |
If the sponge stays clean, a gentle wash plus a stain-blocking primer may be sufficient. If it comes back yellow, brown or greasy, missing out the deep clean is a near guarantee those marks will return through the next coat.
The step nearly everyone skips: proper degreasing
Why water alone won’t fix a yellowing ceiling
Wiping down with plain water can feel like you’ve made a solid start, but it rarely shifts the thin, stubborn film that causes discolouration. Grease and nicotine bond to old paint and need more than a rinse to break them down.
Eight DIYers out of ten go straight from dusting to painting. The yellowing comes back because the greasy film never left.
That’s why professional decorators typically rely on alkaline cleaners here: they cut oily residues and neutralise the layer that would otherwise bleed through into the fresh paint.
The simple degreasing mix that changes everything
For a normal domestic ceiling, you don’t usually need niche trade-only products. A straightforward, correctly mixed solution is often enough. For one average room:
- 10 litres of warm water in a bucket
- 1–2 tablespoons of washing soda (soda crystals) or a strong liquid sugar-soap
- One non-abrasive sponge or microfibre cloth
- A second bucket with clean rinse water
- Stable step ladder and protective gloves
Start by removing dust with a soft brush or a vacuum cleaner attachment. Then clean in workable sections. Wipe with the alkaline solution, taking care not to saturate the plaster. Rinse with a clean, damp sponge. Allow it to dry completely - ideally overnight with a little ventilation.
When yellow stains fight back: moisture, leaks and hidden damage
Why paint blisters, peels or turns patchy
Some ceilings don’t only turn yellow; they bubble, flake, or become uneven, often after cold weather or following heavy showers. When that happens, grease and nicotine may not be the only issue.
Common causes include:
- Old or recent water leaks from the roof or pipes above
- Chronic condensation in poorly ventilated bathrooms or kitchens
- Salt deposits in older plaster, reacting with moisture
- Incompatible layers of old paint, especially gloss or oil-based under newer acrylics
Where water has damaged the surface, washing and repainting alone usually won’t last. The affected area may need to dry for several weeks. For more persistent problems, loose plaster may have to be scraped back, repaired properly and sealed before any decorating begins.
The role of stain-blocking primers
After the ceiling is fully dry and properly degreased, decorators often add a key step: applying a stain-blocking primer. Its job is to act as a barrier, preventing nicotine, soot and historic water marks from seeping into the top coat.
On ceilings with a long smoking history or past leaks, the primer layer matters more than the final colour coat.
For severe staining, many professionals opt for solvent-based options or specialist shellac primers, which usually seal more effectively than standard acrylic undercoats. With one or two coats and adequate drying time, a ceiling that looked permanently patchy can become a stable base that stays white for much longer.
Small habits that keep your ceiling white for years
Daily choices that protect your paintwork
After you’ve put the work into cleaning and repainting, a few simple routines can help the finish last:
- Run the cooker hood every time you fry, grill or sear food.
- Crack a window open during hot showers and for a few minutes each morning.
- Trim candle wicks and avoid burning them for hours in small, closed rooms.
- Dust ceilings lightly once or twice a year with a soft brush on a long handle.
- Check for small leaks or damp rings after storms or plumbing work.
They may seem small, but they greatly reduce the amount of grease and soot the ceiling has to absorb between redecorating.
How to decide between repainting, cleaning or full renovation
Before buying another tin, spend ten minutes looking closely. Check corners, vents and the area above radiators. View the ceiling in daylight and under artificial lighting to spot differences. If it’s mainly dull with a light grey cast, a wash and a single fresh coat might do. If you can see distinct yellow rings, nicotine staining or wavy lines, plan on a deep clean and a stain-blocking primer too.
In older homes, repeated yellowing and peeling can point to bigger issues with insulation or ventilation. Using a basic humidity meter can show whether the room regularly sits above 60% humidity. If it does, improving airflow, fitting extract fans or addressing cold bridges in the building fabric will help protect every coat you apply.
Ceilings record a home’s routines: how you cook, heat, ventilate and live. When you treat yellowing as a sign rather than a purely cosmetic irritation, you often end up with better air quality, fewer damp problems and less frequent repainting. And the next time you’re on the ladder with a roller, the white you lay down is far more likely to stay white.





Comments
No comments yet. Be the first to comment!
Leave a Comment