
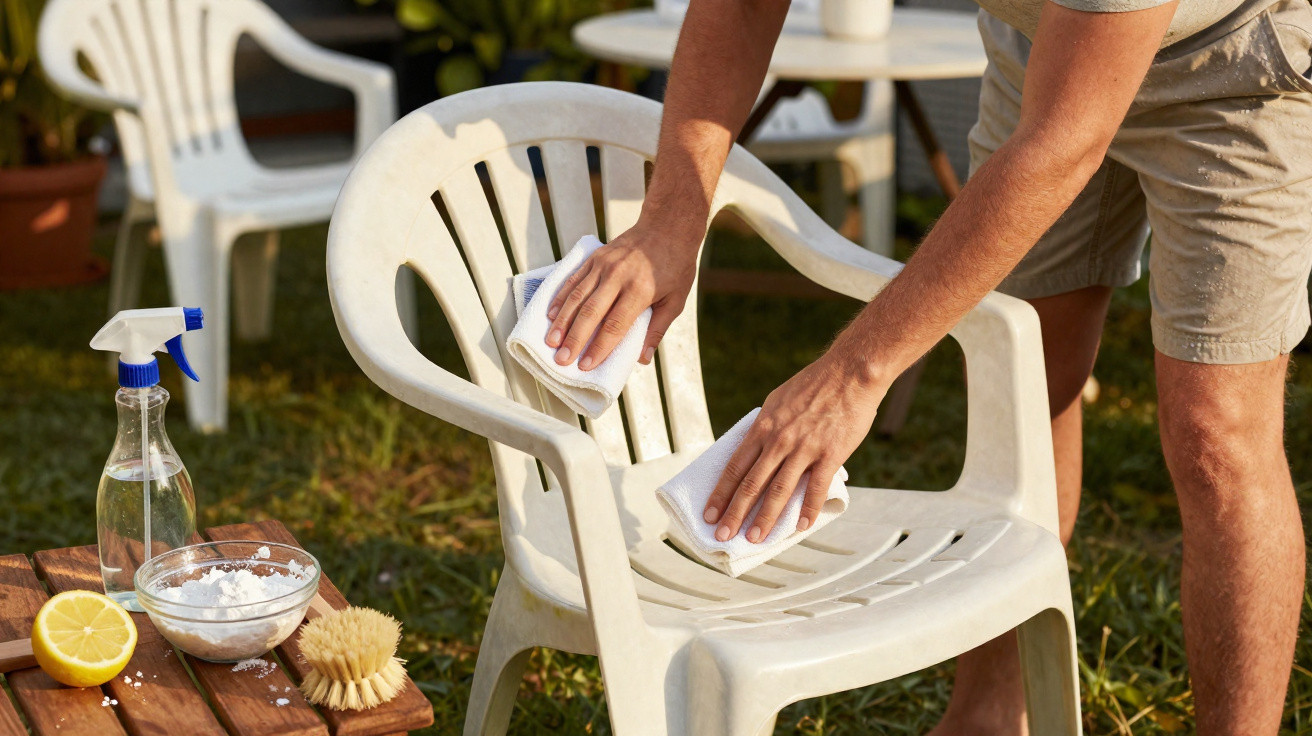
When you open the patio door in spring, the scene is familiar: the table is stained, the chairs have turned grey, and the plastic looks dull and aged. Many people immediately consider buying replacements. Yet an impressive before-and-after transformation is possible with ingredients found in almost every kitchen.
Why plastic garden furniture quickly looks old
Plastic garden furniture has long been one of the most popular choices for balconies and patios. It is lightweight, inexpensive and, at first glance, appears to need very little maintenance. After a few summers of sun and rain, however, that lack of care starts to show.
Three factors are especially hard on the material:
- Sunlight: UV radiation attacks the surface, leaving it rougher and more brittle.
- Dirt and pollen: Wind carries fine dust, flower debris and soot particles, which become lodged in the material.
- Moisture: Rain and dew leave a grey film behind and encourage deposits to form.
Over time, plastic becomes more porous. This means dirt adheres more firmly and the original colour appears faded. White furniture in particular can take on a yellowish tint, while coloured pieces lose their brightness.
Metal, wood and polyrattan also age, but in different ways: metal rusts when its protective coating is damaged, wood turns grey and needs oil or stain, while woven materials do not cope well with constant damp. Plastic has an advantage here: provided nothing has broken, it can often be refreshed remarkably well.
First impressions are often misleading: what looks ready for the tip can often remain usable for several more seasons with a well-planned cleaning routine.
The two-stage plan: deep clean first, then use a household mix
Before applying a specialist mixture, the furniture set needs a thorough initial clean. Otherwise, the cleaner works only on the layer of dirt rather than on the material itself.
Step 1: Remove loose dirt
Start with a dry clean. A hand brush, soft broom or dust cloth is enough to lift away cobwebs, leaves and loose debris. More collects in grooves and beneath seats than you might expect.
Then give the furniture its first wash:
- Fill a bucket with warm water.
- Add a little mild washing-up liquid.
- Wipe everything down thoroughly using a soft cloth or sponge.
This removes grease, surface dirt and old pollen residue. Keep abrasive scouring pads in the cupboard: they scratch the surface and make the furniture more vulnerable over time.
Step 2: The kitchen mix for grey and yellow discolouration
Now for the main trick. A blend of warm water, household vinegar and bicarbonate of soda can noticeably revive a dull surface. All you need is a simple spray bottle.
Prepare the mixture as follows:
- 500 ml warm water
- 1 tablespoon clear household vinegar
- 2 tablespoons bicarbonate of soda
- a small squirt of washing-up liquid
Add everything carefully to the bottle and swirl it gently. Do not shake it too vigorously, as pressure could build up inside.
How to use it:
- Spray the cleaned furniture generously while it is still slightly damp.
- Work the mixture in with a soft sponge or microfibre cloth.
- Leave the mix to work for a few minutes.
- Rinse thoroughly with plenty of clean water.
The combination of mild acidity and fine texture lifts surface discolouration without aggressively eating away at the plastic – a clear advantage over harsh chemical cleaners.
What helps with stubborn stains
Some marks will not shift with the kitchen mixture alone: old rust splashes, dried barbecue sauce or black scuff marks from chair legs. These need a more targeted approach.
On white furniture, a mineral-based cleaning stone can help. These products combine fine powders, soap and conditioning additives. Moisten a sponge slightly, pick up a little product, rub it gently over the affected area, then wash it off thoroughly.
Take care with coloured surfaces. Too much abrasion can leave pale patches. Always test first in an inconspicuous spot, such as underneath the seat, on the back of a chair leg or along the inner edge of a table.
If stains remain despite every effort, this is often an aesthetic rather than a structural issue. The furniture's stability is unaffected, provided the material is not brittle or cracked.
Safety first: when plastic garden furniture really needs to be disposed of
Before scrubbing with full enthusiasm, carry out a safety check. Older chairs in particular may have weak points that are not immediately obvious.
| Warning sign | What it means | Consequence |
|---|---|---|
| Clear cracks in the seat or legs | The material is brittle and its load-bearing capacity is reduced | Better to remove it from use; there is a risk of falling |
| White fracture lines when bent | The plastic has become brittle | Do not place under heavy loads; replace if in doubt |
| Broken struts or armrests | The structure has been interrupted | Repairs are rarely durable; disposal is usually best |
A few scratches and dull patches are purely cosmetic. Proper breaks and deep cracks, on the other hand, have no place in everyday use. A chair collapsing beneath a guest during a barbecue is no joke.
When restoration is worthwhile: sanding and repainting
If the furniture remains sturdy but its patchy appearance is bothersome, there is another option: a subtle “facelift” using sandpaper and suitable paint.
A makeover can be done like this:
- Allow the surfaces to dry thoroughly after cleaning.
- Lightly sand with fine sandpaper, around 120 grit, only until the shine has gone.
- Wipe away all dust carefully.
- Use paint or spray paint specifically approved for plastic.
A fresh colour can look surprisingly modern, especially on simple designs such as a classic stacking chair or rectangular table. Matt shades including anthracite, sage green and warm beige suit current patio trends well.
How to keep plastic garden furniture looking good for longer
Once the set looks presentable again, the next question is how to stop the same problem returning next year. A few regular habits can make a significant difference.
- Look for UV protection when buying: Many manufacturers state whether protection against sunlight is built in.
- Plan winter storage: Furniture ages far more slowly beneath an overhang, in a garage or under a breathable protective cover.
- Avoid oily care products: Oil attracts dirt and may make plastic softer and more porous over time.
- Clean gently and regularly: Wipe it down with washing-up water once a month instead of tackling one major clean each year.
Small care routines spread across the season prevent the big shock on the first sunny day of spring – and are kinder to both your budget and the environment.
Why household remedies are often the better choice
Shops offer numerous specialist cleaners for garden furniture. Many are powerful, but leave a strong smell or irritate the skin if used without gloves. The mixture of warm water, household vinegar and bicarbonate of soda is comparatively mild, affordable and generally safe for most drains.
Even so, it is worth considering a few possible risks. Anyone with very sensitive skin should wear gloves. Delicate surfaces such as natural stone can occasionally react to acids. In those cases, clean the furniture on grass or another hard-wearing surface, and rinse it thoroughly afterwards.
At its core, this straightforward cleaning recipe demonstrates just how much the lifespan of an apparently “cheap” plastic chair can be extended. Anyone who reaches for a sponge and spray bottle before heading straight to the furniture shop saves resources, money and a substantial amount of bulky waste – while still sitting on a visually refreshed garden furniture set at the first barbecue of the season.




Comments
No comments yet. Be the first to comment!
Leave a Comment