
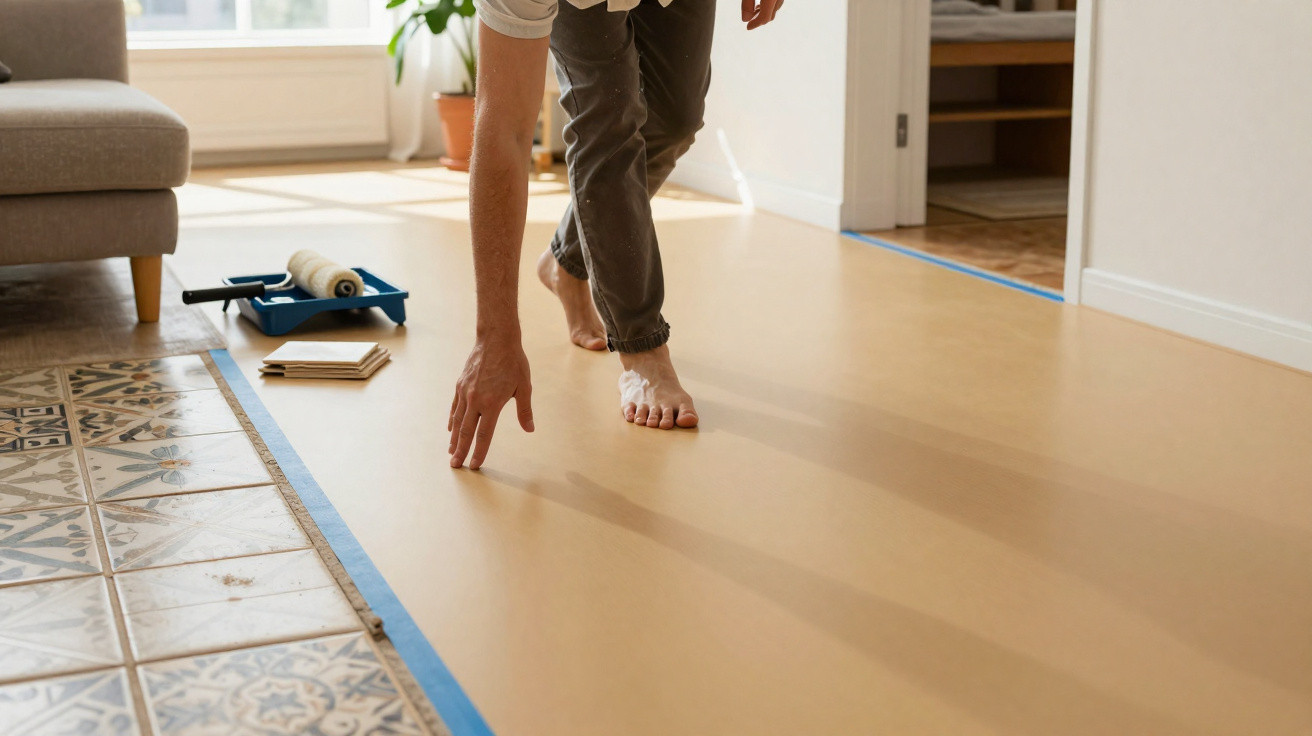
Many flats built in the 1980s and 1990s still have the classic tiled floor: beige, small-format, spotless - yet the whole room can feel instantly dated. If you even think about ripping the tiles out, you can already picture piles of rubble, noise, cost and chaos. This is exactly where an approach comes in that has long been standard in professional settings and is now turning up more and more in private homes.
Why ripping up tiles is usually the worst option
Replacing the entire floor sounds, in theory, like the neatest fix. In reality, it typically means:
- Chiselling off tiles, with dust and noise for several days
- Disposing of rubble, arranging a skip, and protecting the communal hallway
- Rebuilding the substrate, levelling it, and letting it dry
- Laying the new floor finish, doing grout/joints, and adjusting skirting boards
If you’re living in the property while the work happens, you quickly find out how draining it can be. Furniture has to be shifted around or put into storage, doors are left open, and children and pets need to be kept well away from the work zone. On top of that, labour costs are rising and lead times are long.
"A floor upgrade that builds directly on the existing tiles saves time, stress and often many thousands of euros."
That’s the logic behind a specific type of flooring that doesn’t stick on like a film and doesn’t click together like laminate. Instead, it spreads like a thin, liquid layer over the old tiles.
Simply cover the tiles: how the resin-layer method works
The solution is decorative resin, usually based on epoxy or polyurethane. Applied in liquid form - poured or rolled onto the existing floor - it levels out into a smooth, sealed surface. Old grout lines disappear, and the room immediately looks calmer and more contemporary.
Visually, the change is especially striking: instead of a busy grid of joints, you get a generous, continuous plane - similar to a loft-style design floor or the minimal-joint look seen in new-build bathrooms.
Typical benefits of a resin floor over old tiles
- No visible grout lines where dirt can collect
- An easy-care, wipe-clean surface - ideal for kitchens and bathrooms
- Multiple finishes: matt, satin, glossy
- Faster to deliver than a full floor tear-out
- Very hard-wearing and robust when the substrate is sound
In terms of colour, the range runs from concrete grey through warm sandy shades to bright white or deep anthracite. If you like a bolder feel, darker, almost industrial looks fit well; if you prefer crisp spaces, lighter, quieter tones tend to suit.
Where the new coating is particularly worthwhile
Resin over tiles is especially suited to rooms where the floor needs to cope with plenty of wear and still clean up quickly. Typical applications include:
| Room | Benefits of a resin floor |
|---|---|
| Kitchen | Resistant to splashes, grease and stains; easy to wipe |
| Bathroom | Waterproof, low-joint surface; less dirt in transitions |
| Hallway | Scratch-resistant; copes with outdoor shoes and moisture |
| Living room | Calm, modern look; ideal for open-plan layouts |
It’s also an appealing option for newly purchased existing flats. If you want to move in quickly, resin can often transform the overall impression within just a few days - without confronting your landlord or the freeholder/residents’ management company with disruptive demolition work.
The key requirement: sound tiles underneath
As clever as this method looks, it only works when the existing tiles are still stable. Before any coating goes down, the floor needs a proper check:
- Tap test: tiles that sound hollow or move are a warning sign
- Joint inspection: loose grout or cracks must be dealt with
- Moisture: the floor has to be dry, otherwise blisters can form
- Adhesion: very smooth tiles often need a special primer
"If you pour resin onto an unstable floor, you’re just moving the problem up a layer - the new coating will eventually come loose."
In many cases, it’s enough to replace or secure individual damaged tiles, fill the joints, and clean the surface thoroughly. Grease, soap residue and old care products can otherwise interfere with adhesion.
How professionals handle the preparation, step by step
Before the actual coating is applied, professionals typically work through several rounds:
- Thorough vacuuming and cleaning with a grease-cutting cleaner
- Observing drying times so no residual moisture remains
- Regrouting loose joints or closing them with filler
- Sanding tiles if needed, or treating them with an adhesion promoter
- Applying primer so the resin bonds properly
Closing the joints is particularly important. If the recesses aren’t levelled cleanly, the old lines can later show through as faint ridges - especially with light colours or strong, raking daylight.
DIY or bring in a professional?
At first glance, resin looks like a typical DIY job: buy a kit, mix it, roll it on - done. In practice, the finish depends heavily on the workmanship.
For small, rectangular rooms without lots of corners and alcoves, DIYers can start with ready-made kits from around €18 per square metre. In that case it’s usually enough to follow the instructions precisely, work neatly, and allow plenty of drying time.
For larger rooms, open-plan living areas or awkward bathrooms, a specialist firm is often the better route. Experienced teams understand layer thickness, temperature, pot life (working time) and tool choice - which reduces the risk of ripples, runs or visible overlaps.
"The larger and more visible the room, the more a professional tends to pay off - especially if the floor is meant to last for years."
In terms of cost, high-quality resin floors installed by a trade contractor are roughly €100 to €150 per square metre, depending on colour, texture and slip resistance.
Non-slip in the bathroom, silky in the living room: choosing the right surface
Resin is not all the same. Depending on the room and how it’s used, both the texture and the look should change:
- Bathroom and shower: a lightly textured, slip-resistant surface so wet feet have secure grip
- Kitchen: a satin finish that doesn’t highlight marks too strongly and stays easy to clean
- Living room and hallway: a smooth but non-mirror finish, often satin, for a premium look
Extra protective layers - such as a transparent sealing lacquer - can improve scratch resistance. In high-traffic spots like entrance areas or in front of patio doors, that added layer is particularly worthwhile.
What resin really can do - and what it can’t
The new coating brings plenty of benefits, but there are also points worth knowing in advance. The key considerations are:
- Resin floors tend to feel cool underfoot, much like tiles. Combined with underfloor heating, they work very well.
- Point impacts from sharp objects can cause damage, but it can often be repaired locally.
- UV light can, with some systems, lead to slight colour changes over time. Modern products are much improved, but large south-facing windows can still be a factor.
- If you’re extremely sensitive to smells, you shouldn’t sleep or work in the room during application and drying.
In return, you get a floor that has very little to do with a classic tiled look. Rooms can appear larger, more modern and quieter - without having to remove the existing floor entirely.
Practical examples and ways to combine finishes
Across many renovation projects, resin is deliberately used only in parts of the home. Common combinations include resin in the kitchen, hallway and bathroom, paired with parquet or vinyl in the living and bedrooms. This way the cosier feel remains in the living spaces, while the hard-wearing zones become as low-maintenance as possible.
It’s also an interesting choice for open-plan layouts. If you want to create a visual separation between kitchen and living space, subtle colour steps can do the job - for example, a light grey in the kitchen and a slightly warmer tone in the living area. The surface stays consistent, yet the atmosphere shifts gently.
For allergy sufferers, a low-joint resin floor can be a plus. Dust, pollen and pet hair have fewer crevices to catch in and are easier to remove. In households with children, the cleaning aspect matters too: knocked-over drinks, paint marks or building blocks are far less dramatic than on delicate timber floors.
If you’re considering updating a tired tiled floor, demolition no longer has to be the only option. A carefully planned resin layer can bridge the gap between an existing surface and a new look - with far less noise, mess and stress.






Comments
No comments yet. Be the first to comment!
Leave a Comment