
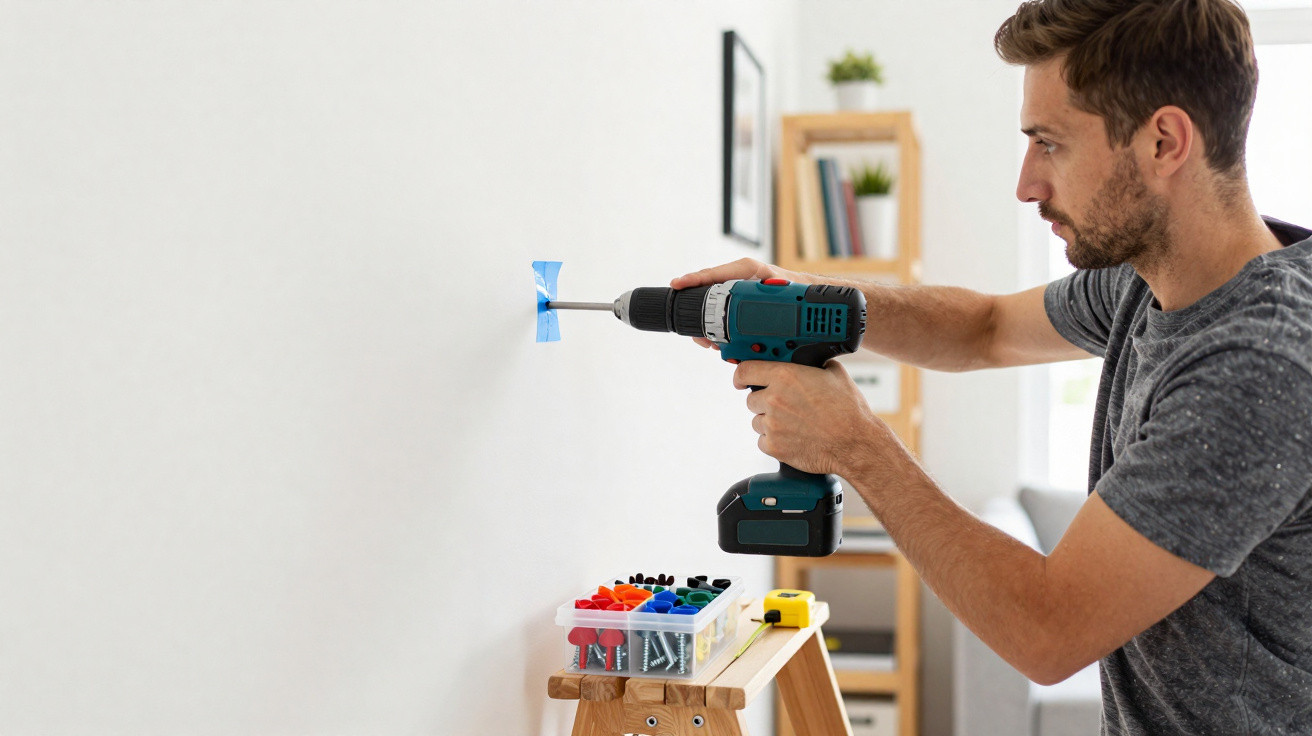
Many DIYers drill a hole, push in a wall plug, tighten the screw - then wonder why the new coat rack (and the coats) end up back on the floor. The difference between a wobbly fixing and a rock-solid wall fixing usually isn’t expensive professional kit, but a few targeted techniques that even seasoned hobbyists often miss.
Why so many wall plugs fail
The most common mistake starts long before the first dust appears: if you don’t know what the wall is made of, you’re working blind. That’s exactly when plugs spin in place, tear out, or hold only until the first heavy bundle of winter coats is hung on the rack.
“A wall plug’s durability depends 80% on three things: the right plug, a precise hole, and a clean substrate.”
The good news is that if you get those three points right, you can securely fix surprising amounts of weight even on awkward walls - from an XXL mirror to a TV on a thin partition wall.
The right wall plug for the right wall
Before you even fit a drill bit, there’s one basic job to do: identify the wall type. It takes seconds, but it’s what decides whether the fixing succeeds or fails.
How to tell what type of wall you’re dealing with
- Concrete or solid masonry: hard, dull sound when you tap it; the drill progresses slowly.
- Brick or hollow brick: resistance changes as you drill; the drilling dust is fairly coarse; parts of the hole may crumble.
- Plasterboard / stud wall: bright sound; the drill goes in easily; very fine, pale drilling dust.
If you’re still not sure, make a small test hole in an inconspicuous spot. That can save you from large breakouts or multiple failed holes in a prominent place in the living room.
Which wall plugs suit which jobs
Shops offer a seemingly endless selection of wall plugs - but in practice you only need to understand a few key types:
- Standard and universal plugs: work well in concrete and solid masonry. They expand in dense material and wedge themselves in place.
- Toggle and cavity fixings: for plasterboard and thin stud walls. They open out behind the board over a wide area and spread the load.
- Special plugs for hollow bricks: often have fins or longer expansion zones so they grip the internal webs rather than disappearing into the void.
The classic, costly mistake is forcing a short plastic plug into a thin stud wall. The screw may seem secure at first - until you add a bit of load. Then the plug simply rips the plasterboard.
Common traps when choosing wall plugs
Two misunderstandings crop up again and again:
- Plug too short: it only bites near the surface, so the force isn’t distributed inside the wall. This often causes breakouts around the hole.
- Plug too long: especially in thin walls, it can crack the rear face - or just slide into empty space.
If you pause for a moment, check the wall, and read the specifications on the packet, you’ll save filler and frustration later. The uncomfortable truth is often this: the drill wasn’t “bad” - the issue was the combination of wall, plug, and load.
The drill hole: millimetre precision, not guesswork
Once you’ve chosen the plug, the hole decides the outcome. A few millimetres too large or too small can be enough to drastically reduce holding power.
Diameter and depth - the simple rule
Every plug packet lists two key details: the recommended drill diameter and the maximum screw size. Those figures aren’t decoration - they’re your safety belt.
- Hole too large: the plug wobbles, spins, and can’t expand properly.
- Hole too small: the plug deforms or tears when hammered in, which massively reduces its holding strength.
The drilling depth should be slightly greater than the plug length. That gives the plug room to expand without pushing pressure back onto the wall surface. A handy trick is to wrap masking tape around the drill bit at the required depth so you don’t accidentally drill too far.
What matters with the drill
A blunt bit in a shaky drill won’t produce a precise hole. For concrete, you need hammer action and a sharp masonry bit. For plasterboard, hammer action is a no-go - a clean standard drill bit is perfectly adequate.
Key points for a clean result:
- Keep the drill at a right angle to the wall.
- Use moderate pressure; the machine should do the work, not brute force.
- Replace old, re-sharpened bits, especially for hard materials.
Anyone who has drilled into concrete with a fresh bit will notice it immediately: the same DIYer suddenly looks like a professional.
The small but crucial detail: cleanliness
Drilling dust acts like a thin release layer between the plug and the wall. It makes the plug slip more easily and reduces friction. This is where the “secret” professional trick comes in:
“Before inserting the wall plug, thoroughly remove dust from the drill hole - with a vacuum cleaner, a blower, or, in a pinch, a drinking straw.”
That one simple step noticeably boosts holding power, especially in porous or sandy substrates. Many professional fitters swear by it and would never push a plug into a dusty hole.
The professionals’ underrated tricks
If you regularly fit shelves, TVs, or wall cupboards, you develop small routines that most people never learn at home - and that make the difference when things get tricky.
Reinforcing difficult walls in a smart way
Older, cracked plaster walls and badly blown-out areas are particularly problematic. Targeted approaches help:
- Timber reinforcement: behind plasterboard, you can add a timber batten and screw into that later. The kitchen wall unit then isn’t relying only on a thin board.
- Longer plugs: in hollow blocks, a longer plug may reach a more distant web and hold securely there.
- Metal cavity fixings: these spread out widely behind the board and distribute weight better than simple plastic plugs.
So if, while starting the hole, you notice the substrate crumbling, don’t just drill a second hole next to it. A small reinforcement solution is usually the better route - otherwise you’re likely to repeat the same problem.
The tape trick and other small helpers
A piece of decorators’ masking tape or clear adhesive tape over the drill point helps prevent edges from chipping - especially on tiles or freshly painted walls. The hole comes out cleaner and the finish looks better.
In very porous walls, some professionals add a tiny drop of grab adhesive or injection mortar into the hole. Once cured, the plug sits almost immovably. This method suits heavily loaded fixings, such as wall cupboards in crumbly masonry - but be aware: later adjustments are almost impossible.
How much weight can each wall plug take?
If you’re mounting heavy loads such as TVs, kitchen wall units, or large mirrors, don’t guess - plan. As a rough guide, check the manufacturer’s specifications; they often include concrete figures in kilograms.
A few practical rules of thumb:
- Light loads (pictures, small shelves) - in solid masonry, a normal plug is usually enough.
- Medium loads (larger shelves, coat racks) - choose a high-quality branded plug; in cavity walls, use dedicated cavity fixings.
- Heavy loads (wall cupboards, fully loaded shelving) - set multiple fixing points and, where possible, drill into load-bearing walls.
If you plan deliberately, you spread the weight over several plugs instead of hanging everything from a single point. That dramatically improves safety - particularly in properties with older construction.
Extra tips for safe DIY
Before drilling any hole, be clear that services often run behind walls. A cable and pipe detector helps you avoid electrical cables or water pipes. In kitchens and bathrooms especially, one wrong hole is enough to risk an expensive leak or an electric shock.
The terminology around wall plugs can also sound more complicated than it is. “Expansion” simply means the plug widens in the hole and wedges tightly. “Cavity” means there’s empty space behind the visible board, so the fixing must open out or brace itself to hold.
If you spend an evening or two testing your own walls, buying the right plugs, and practising the steps described here, you’ll quickly find that wall fixing goes from being an annoying topic to a routine that’s almost enjoyable - particularly when the shelf is still solid months later, even though it’s long been overloaded.






Comments
No comments yet. Be the first to comment!
Leave a Comment