
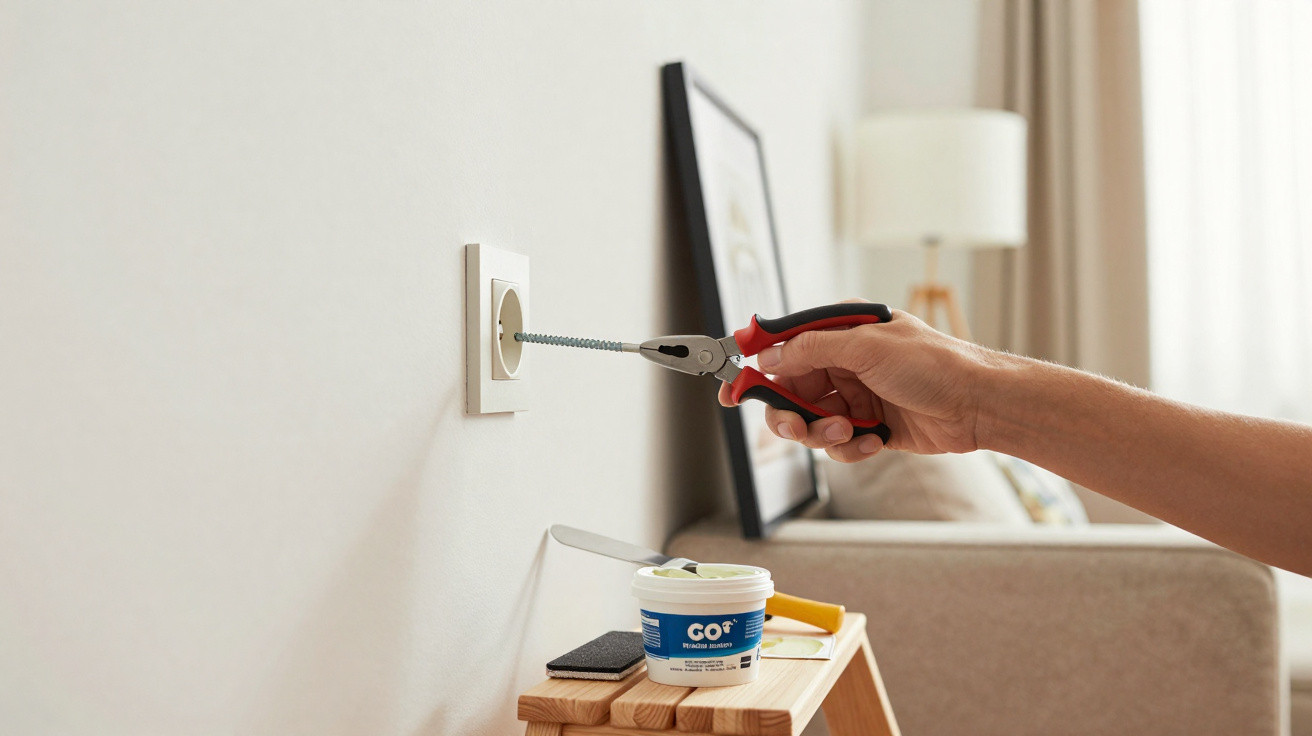
If you’ve spent January rearranging your home-moving shelves, rehanging pictures, or changing the layout-you’ll know what usually follows: where a decoration used to be, you’re left with holes and old wall plugs. Many people try to yank them out in a hurry, only to turn a small, harmless hole into a crater in the plaster. With the right approach and a few everyday tools, you can avoid that entirely and give the wall a second chance-without leaving visible marks.
Why brute force ruins the wall
It’s a familiar moment: you reach for pliers, clamp onto the bit of plug sticking out, and pull as hard as you can. It feels sensible-but from the wall’s point of view, it’s the worst possible method.
"Every wall plug is designed to resist being pulled out-it’s meant to hold, not to fall out."
Whether it’s a cavity plug or a standard plastic plug, both are built to withstand strong pull-out forces. In masonry, small barbs bite into the drilled hole; in plasterboard, a cavity fixing opens behind the sheet like a tiny umbrella. If you pull straight out, the tool doesn’t win-the leverage in the plaster does. Brittle plaster breaks away, paint chips, and what was once a neat hole becomes a damaged patch several centimetres across.
So if you want to rearrange your space without stress in future, you need a technique that loosens the plug rather than tearing the plaster out with it.
The gentle method using a screw and flat-nose pliers
The good news is that tidy removal doesn’t require expensive specialist gadgets. In most homes, what you need is already in the toolbox.
Tools you actually need
- a screw with the same diameter as the original plug, or very slightly smaller
- flat-nose pliers or water pump pliers
- a screwdriver that matches the chosen screw
- a flexible filling knife or decorator’s scraper
- filler (ready-mixed in a tub/tube, or powder filler)
- fine sandpaper (120 to 180 grit)
With this basic kit, you can deal with almost any plug hole so that only minimal filling is needed afterwards.
Create a “handle” first, then lever
Old plugs are often brittle, or they’ve been cut flush with the wall. That’s exactly why pulling them out with fingers-or gripping the plastic directly with pliers-usually fails. A better plan is to give yourself a solid metal extension to hold.
Screw a screw into the plug by just a few turns, around 1–2 cm deep. It needs to bite, but it must not push the plug further outwards inside the wall. Done correctly, you’ve created a strong grip point that the pliers can hold securely without stressing the plaster.
The key move: lever, don’t yank
Now for the technique that matters. Grip the screw head with the flat-nose pliers. Instead of pulling straight out, gently rock the pliers back and forth-small movements left and right, or slightly up and down-so the plug gradually releases from the surrounding material.
"The wall wins when you pull. You win when you lever gently."
If it still won’t shift easily, use the pliers as a mini lever: place a small piece of wood or cardboard between the pliers and the wall to prevent pressure marks. Then use the curve and pivot of the pliers to lever the screw out millimetre by millimetre. This way, the plug slowly migrates outward without breaking off chunks of plaster.
When you’re finished, you’re left with a relatively clean cylindrical hole-far easier to hide than a burst, ragged opening with broken edges.
Filling like a professional: making the hole genuinely disappear
Once the plug is out, the next stage determines how the repair will look later: filling and smoothing. This is where most bodges are created-ones you can clearly spot in sunlight or under a lamp.
Choosing the right filler
Small holes from standard wall plugs up to about 8–10 mm are best closed with ready-mixed filler from a tube or tub. It spreads easily, is workable, and usually dries fairly quickly.
For larger voids-such as those left by heavy-duty fixings-a powder filler mixed with water is often the better choice. These fillers set more firmly through a chemical cure and shrink less as they dry, reducing the chance of a visible dip appearing later.
Fill properly: slightly too much is better than too little
Don’t just skim over the surface. Push the filler firmly into the hole with the edge of the filling knife so no air pockets remain. Air leads to sinking once everything dries. It’s fine if the repair sits slightly proud of the wall.
"A tiny bump is easy to sand down-a dip means you have to fill again."
Smooth it with a couple of crossing strokes: one horizontal, one vertical. That helps the new surface blend with the wall’s existing contour. Don’t chase a mirror-flat finish on the first pass-leaving a little excess is intentional.
Final sanding and paint: the trick to an invisible repair
After drying-depending on the product and the hole size, anywhere from 2 to 24 hours-the patch will often feel a bit raised and slightly rough. That’s when you move on to finishing.
Fine sandpaper for a seamless surface
Use fine-grit sandpaper and work in gentle circular motions. Keep the pressure light so you don’t carve fresh scratches into the surrounding area. Check frequently with the flat of your hand.
When you can’t feel an edge and your hand glides evenly across the patch, the surface is ready for paint. On smooth walls in particular, it’s worth taking an extra few seconds here-because lighting will ruthlessly highlight any remaining marks.
The right way to touch up paint without a patch showing
If you still have the original paint in the cupboard, you’re at an advantage. If not, get as close a match as possible. Even more important than the shade is the application technique.
- Lightly load the roller or brush-don’t let it become saturated.
- Cover the filled spot first so it’s opaque.
- Then, using an almost dry roller or brush, feather the paint out beyond the edges.
This avoids a hard boundary and creates a soft transition instead. Short, light strokes help the new paint film blend visually into the old one. Once dry, the area usually looks continuous, without an obvious “patch” on the wall.
Why this approach makes rearranging your home easier
When you know plug holes can be removed cleanly, you plan your space with far less anxiety. Fear of “ruined” walls stops many people from changing things: the shelf stays in the wrong place out of convenience, and the mirror remains where it’s always been. Using the method above removes that mental barrier.
Tenants benefit particularly, because moving out often comes with the expectation of a property that’s “broom clean” and visually presentable. If you remove plugs in a controlled way, fill neatly, and blend the paint properly, you’ll be in a much stronger position at handover-and you’re less likely to end up in disputes with the managing agent.
Common mistakes you can avoid
- Using toothpaste or soap as filler-they crumble and discolour.
- Hammering the plug deeper into the wall-the hole quietly becomes larger and makes later repairs harder.
- Sanding with coarse paper-it scratches the surrounding area more than it helps.
- Painting with a sharp edge around the repair-the “patch” becomes instantly obvious.
Practical additions for common problem cases
What if the plaster is crumbly or the plasterboard is breaking up?
In older buildings or with low-quality plasterboard, the hole can start to fray before the plug is even out. In that situation, a two-step approach works best: first remove loose particles with a finger or brush, then lightly dampen the edges. The filler grips much better and is less likely to pull away or crack.
If the hole has become much larger than intended, you can also slide in a small piece of matching plasterboard and fill over it. For typical living spaces, though, a slightly thicker layer of filler is usually enough.
How many holes can you realistically hide on one area?
If you’re taking down a gallery wall, you can end up facing a whole landscape of plugs. Technically, you can fill, sand, and paint over ten or fifteen holes one after another. Visually, however, a heavily repaired section can start to look blotchy if multiple filled spots and slightly different paint tones meet.
In those cases, a different strategy often pays off: fill all holes properly, sand the area, and then repaint the entire section with a roller instead of touching up individual points. The finish looks uniform, and even in raking light the old plug holes are no longer detectable.
If you take these steps to heart-set a screw, lever gently, fill properly, sand finely, and feather in the paint-you won’t dread shifting furniture next time. Moving a shelf or picture becomes a matter of taste, not a risk to your plaster.






Comments
No comments yet. Be the first to comment!
Leave a Comment