
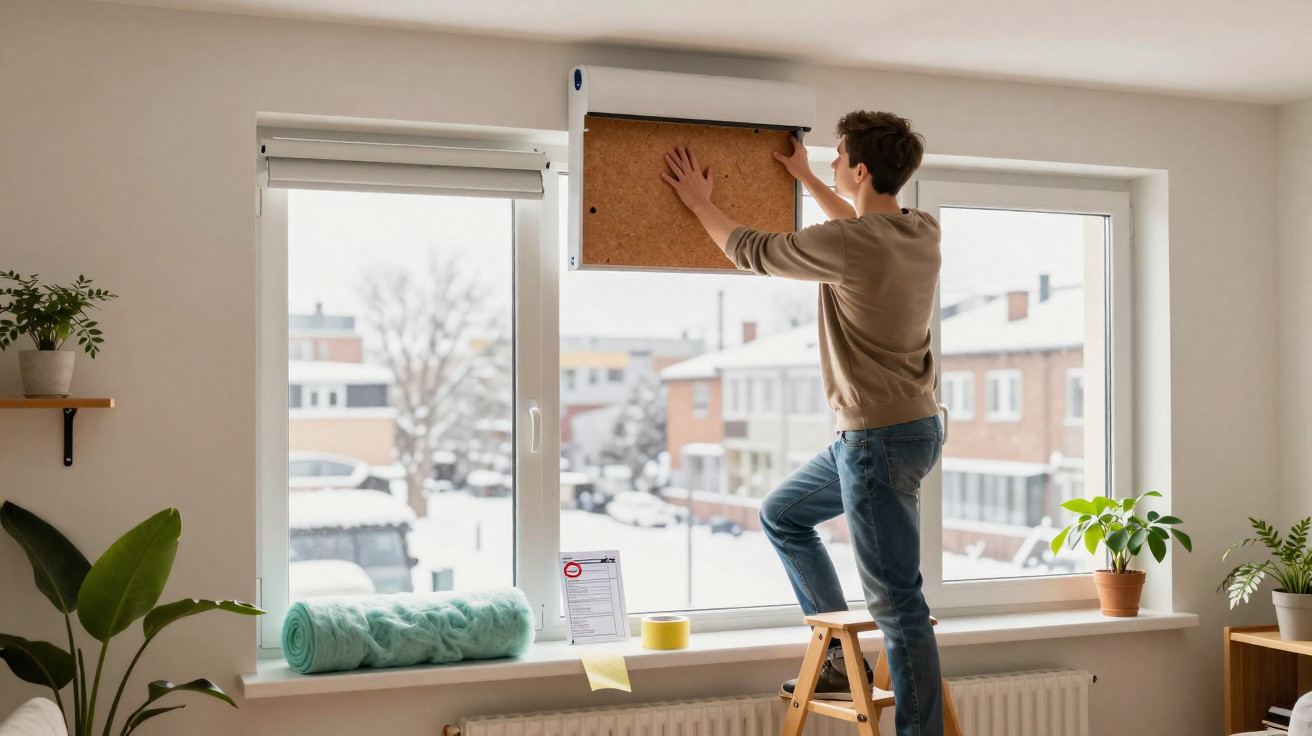
If you feel an icy draught by the window in winter, the first assumption is usually that the glazing is leaking. Yet the real weak point is often slightly higher up: the roller shutter box. A few targeted measures can insulate this hidden energy drain far more effectively – without major building work or spending a fortune.
Why roller shutter boxes let in so much cold
Modern roller shutters are rightly regarded as effective protection against heat, cold, noise and intruders. The issue is that the box housing the rolled-up shutter curtain is often thinly constructed, with poor insulation or none at all. This can create a major weak spot in the building envelope.
“A leaky roller shutter box acts like a miniature open window – around the clock.”
Cold outdoor air enters the room through this area, while warm indoor air escapes outside. This creates thermal bridges that push heating costs upwards. Energy suppliers estimate that sealing and insulating leaks of this kind can save up to 20 per cent of energy, depending on the home's starting condition.
Typical signs of a poorly insulated box include:
- A noticeable draught when you run your hand along the upper part of the window
- A wall that feels significantly colder around the box than elsewhere
- Condensation, or even slight mould growth, around the box
- Heating that runs for a long time without making the room comfortably warm
Preparation: how to start safely and avoid damage
Some preparation is needed before insulating the box. This is important to ensure that nothing jams later and that the new materials adhere properly.
- Raise the roller shutter fully so that the curtain is completely inside the box.
- Isolate the power supply to the roller shutter motor by switching off the circuit breaker or unplugging it, preventing accidents.
- Open the roller shutter box carefully – depending on the model, this means unscrewing or unclipping the cover.
- Inspect the inside closely: where is there room for insulation, and where does the shaft move?
- Use a tape measure to check the clearance between the roller shutter shaft and the inner walls of the box.
There is often very little space available for insulating material. That is precisely why it is worth checking carefully, so that nothing rubs against the shutter later. Then clean everything thoroughly, removing dust, cobwebs and loose debris with a dry cloth or vacuum cleaner. Adhesives and insulation boards will only remain securely in place on a clean surface.
The best insulation materials for roller shutter boxes
The right insulation depends on the available space, your budget and your priorities – whether you favour natural materials, particularly good sound insulation or, above all, low costs.
Natural and slim: cork insulation
Expanded cork is a popular natural insulating material. It is compressed using heat, contains no chemical additives and is surprisingly durable. Available in various densities and thicknesses, it can make good use of even narrow cavities.
- Good thermal insulation despite a relatively low thickness
- A renewable raw material, generally free from problematic ingredients
- Dimensionally stable and easy to cut
Cork boards can be shaped with a sharp knife and bonded to the interior walls of the box using a suitable adhesive.
A DIY shop classic: mineral wool
Mineral wool insulation, such as rock wool, is very widely used. Made from molten rock, it is non-combustible and relatively inexpensive. For roller shutter boxes, boards or mats between 2 and 5 centimetres thick are often sufficient.
“Even a few centimetres of insulation can substantially reduce cold ingress when the box had no insulation at all beforehand.”
Rock wool adapts well to uneven surfaces and is unaffected by moisture. Wear gloves and, if necessary, a mask while cutting it, as the fibres may irritate the skin.
For a quieter home: sound-absorbing foams
Anyone tackling street noise as well as cold often chooses specialist foam materials. They absorb sound waves effectively and reduce vibrations transmitted into the room through the box.
Special grooved or egg-crate foams for roller shutter boxes can often be fitted easily. One important point: do not use foam that is too soft, as it may later become compressed and lose its insulating performance.
Specialist solutions for roller shutter boxes
Complete insulation systems designed specifically for this task are available from retailers. They are also aimed at people who do not usually undertake DIY work.
Preformed insulation boards for the box
Some manufacturers sell shaped, grooved rigid-foam boards suitable for many standard boxes. They can be trimmed to size and fixed using grab adhesive.
- Lightweight and straightforward to handle
- Smooth surfaces that collect very little dust
- Often a good balance between thickness and insulating performance
These systems frequently include sealing profiles for joints as well, ensuring that air can no longer pass through.
Sealing gaps: insulation alone is not enough
Installing insulation boards alone is rarely sufficient. Many boxes have small gaps around the cover or sides that allow cold air to flow in. These areas can be sealed with draught-excluding tape or a permanently flexible silicone sealant.
Common areas requiring additional seals are:
- The join between the cover and wall
- Side gaps between the box and the window frame
- Openings around cable entries and strap guides
“Combining insulation inside the box with tightly sealed joints has the greatest effect on heating costs.”
How to insulate a roller shutter box step by step
Using the measures outlined above, this is a fairly manageable project that many people can complete in an afternoon.
- Open the box, clean it and measure it accurately.
- Cut the insulation material to fit, leaving clear movement space for the shaft and shutter curtain.
- If needed, lightly roughen the interior walls so the adhesive bonds more effectively.
- Apply the insulation boards across the surface using suitable grab adhesive, pressing them firmly into place.
- Seal joints with sealing tape or silicone.
- After a short drying period, carefully check whether the roller shutter moves freely.
- Close the box again and restore the power supply.
If you are unsure whether the roller shutter will rub anywhere, first test a small piece of insulation on the side wall only. If it operates without any problems, you can continue with the remainder.
Expected costs – and which options are worthwhile
Compared with other refurbishment measures, material costs remain modest. Approximate guide prices per box are:
| Material | Approximate price range per box | Key feature |
|---|---|---|
| Cork boards | €20–€40 | Natural, good thermal protection |
| Rock wool / mineral wool | €10–€25 | Low-cost, proven option |
| Specialist rigid-foam systems | €30–€60 | Easier installation, matched components |
The poorer the original condition, the faster the work pays for itself. In older homes with completely uninsulated boxes, the investment may be recovered after only a few heating seasons.
Common mistakes and how to avoid them
The same errors often occur when insulating roller shutter boxes. A little planning makes them easy to avoid.
- Insulation that is too thick: If the shutter curtain rubs against the insulation, the motor may be damaged or the strap could break.
- Ignoring moisture issues: Remove mould inside the box before insulating it. Otherwise, it can continue growing unnoticed.
- Sealing only part of the box: Unsealed gaps undo some of the effort spent on insulation.
- Using the wrong adhesive: Not every adhesive will stick to every surface or be compatible with insulating materials. Follow the manufacturers’ instructions.
Greater comfort at home through small details
Improving roller shutter box insulation does more than reduce heating costs. Rooms feel more comfortable overall because cold areas no longer develop directly around the window. Radiators do not need to work as hard, temperatures remain more stable and draughts largely disappear.
This is especially noticeable in bedrooms and children’s rooms. Many people report quieter sleep and less dry heated air after upgrading, as they can turn their thermostats down slightly.
If you are already planning to replace the windows, it makes sense to consider the roller shutter box at the same time. New, better-insulated boxes can often be installed in one go, or existing models can be upgraded using suitable systems. This keeps the additional work manageable as part of an already planned renovation, while the energy savings continue over the long term.






Comments
No comments yet. Be the first to comment!
Leave a Comment