
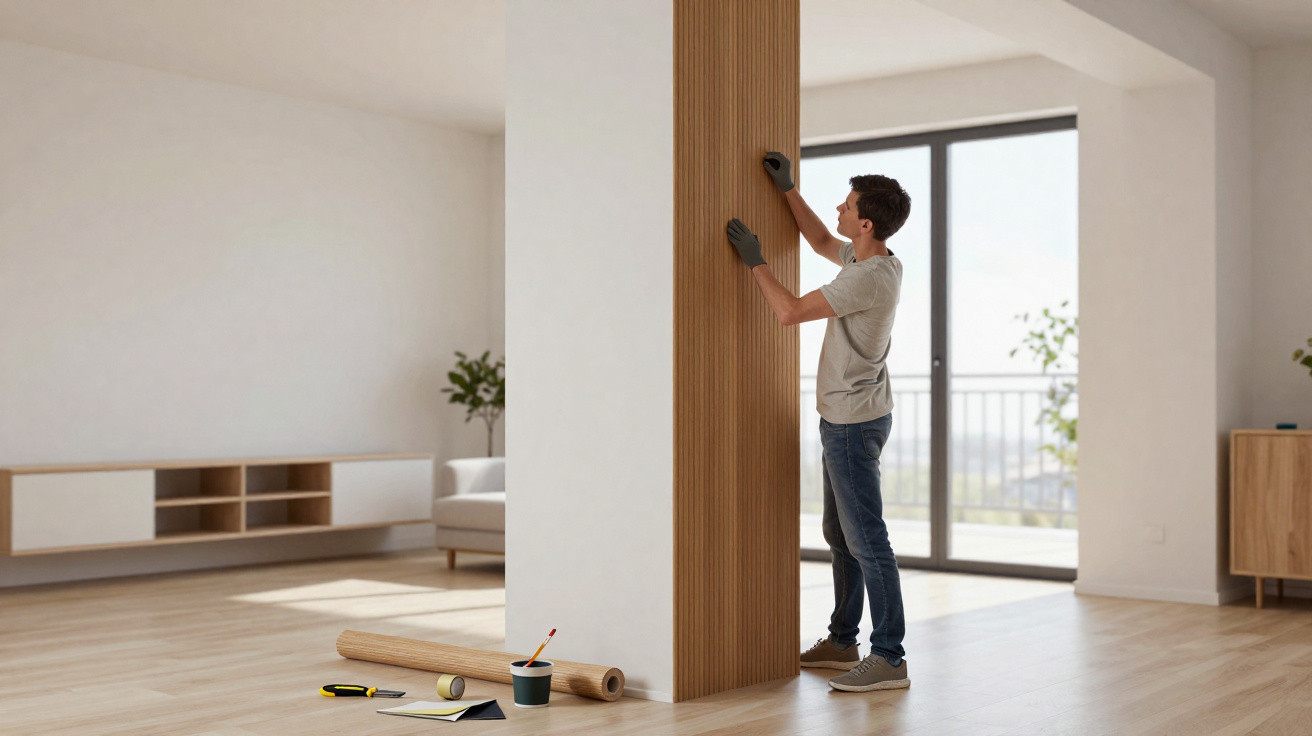
A single roll of ribbed wood veneer, a spare afternoon and a bit of confidence can subtly transform the feel of an entire home.
What began as a quick fix for basements is now turning up in lounges, balconies and gardens: flexible pole wrap that’s wrapped, trimmed and glued in inventive ways so ordinary posts, flat-pack furniture and plain balustrades look considered rather than makeshift.
What exactly is pole wrap and why is everyone using it?
Pole wrap is a bendy sheet of thin material-most often real-wood veneer-machined with grooves to form a fluted pattern. Supplied in a roll, it curves neatly around round forms and can be bonded to most solid, rigid surfaces. It was originally marketed to conceal structural support columns in US basements.
These days it has moved into mainstream interior DIY. From short-form videos to the aisles of DIY superstores, that fluted texture is appearing on sideboards, kitchen islands and even balcony screens. It lands because it delivers several things at once: the warmth of timber, gentle shadow lines from the grooves, and a cleaner, more architectural finish.
Pole wrap works like a second skin: it dresses the surface without touching the structure, which means no heavy renovation and fewer permits.
As it sits on top of what’s already there, it’s generally treated as decorative rather than structural work. That makes it appealing to renters and homeowners who want a noticeable upgrade without tearing the room apart.
Wrapping structural posts: the original glow-up
Load-bearing posts do important work, so they must never be cut, notched or shifted. Builders typically secure posts to concrete using bolts, brackets and chemical anchors, and those fixings need to remain sufficiently visible for inspection. Pole wrap doesn’t change any of that-it simply covers the surface in the way clothing sits over a frame.
How to turn an ugly post into a feature column
For a straightforward transformation, most DIYers will:
- measure the post’s circumference accurately;
- cut a section of pole wrap using a fine-tooth saw or a sharp utility knife;
- spread construction adhesive or a high-grab glue over the post;
- position and press the wrap on, then clamp or tape the seam until set;
- lightly sand and finish with stain, oil or paint.
In a lounge, an industrial-looking steel column can read as a warm, timber-style feature that ties in with floorboards or shelving. In a basement, the solitary pole that once felt like it ruined the layout can suddenly make sense-becoming part of a bar area, a reading nook or a home gym rather than an obstruction.
On patios and decks: thicker posts, softer lines
Outdoors, the same approach can change the mood of a terrace or veranda. Wrapped posts appear more substantial and intentional, closer to the kind of architectural timber you might see at a boutique hotel. People often lean into the upgrade by adding outdoor curtains, lanterns or hanging planters to the refreshed columns.
The wrap should never trap water against a load‑bearing post. Small gaps, breathable finishes and stainless fixings help the structure last longer.
Exterior installations need weather-appropriate finishing and careful details: stainless steel screws or staples for fixing, a hard-wearing exterior varnish, and routine checks for damp or insect activity behind the cladding.
Interior DIY: 6 smart ways to upgrade furniture with pole wrap
Furniture is where pole wrap tends to look most impressive. Add grooved veneer to flat cabinet fronts or budget chipboard pieces and they can quickly feel more crafted and intentional.
1. Fluted dresser or sideboard fronts
A common starting point is a plain chest of drawers. The wrap is cut into panels sized to each drawer front, glued in place, then trimmed cleanly before fitting simple handles. Those fine vertical grooves cast shadows that echo high-end joinery-especially when matched with black, brass or stainless steel pulls.
2. Sculptural coffee table bases
Drum-style coffee tables can be expensive off the shelf. Using pole wrap, DIYers often take a basic cylindrical base (or even a square plinth), wrap it, then add a top in glass, stone or a timber disc. The fluting gives the base a sculptural quality, while the top stays deliberately simple.
3. Discreet upgrades to chair and stool legs
Thick chair legs or bar stool legs can look visually heavy. Wrapping narrow strips of pole wrap around the lower portion introduces a tailored detail and can make the legs appear slimmer. If you then sand and paint the whole chair a single colour, the design reads as one cohesive piece.
4. Boutique-style fluted headboards
A headboard sets the tone of a bedroom, and pole wrap makes custom shapes more achievable. Many DIYers bond wrap panels to plywood cut as a soft arch or a simple rectangle, then mount it behind the bed. A clear finish highlights the grain; painting it to match the wall produces a quiet, textured background.
5. Shelf edges and bookcases with more depth
Even a basic flat-pack bookcase can look more substantial. By fixing strips of wrap along the vertical edges, you create a framed effect around the shelves. On a media unit, the same approach can disguise cable cut-outs and make the entire wall feel more deliberate.
6. Small accent panels and room “micro-zones”
Short runs of pole wrap placed behind a desk, beside a reading chair or under a breakfast bar can define micro-zones in open-plan spaces. Painting the wrapped section a deeper tone-or staining it darker than the surrounding wall-strengthens the sense of a dedicated corner without putting up partitions.
Fluted veneer takes paint well, but stain or oil preserves the grain and avoids the plastic feel you sometimes get with plain MDF upgrades.
Outdoor projects: 5 ideas for privacy and texture
A second wave of pole wrap projects is heading into gardens and onto balconies. In compact gardens and city flats, the desire for privacy often goes hand-in-hand with wanting something softer than bare metal railings.
1. Partial privacy on fences
Rather than replacing a full fence, some homeowners fix pole wrap strips to only selected panels. Alternating flat boards with fluted sections breaks up long stretches of timber and makes the boundary look designed. Because the surface is grooved rather than made from solid boards, daylight still plays across it as the sun moves.
2. Backdrops for climbing plants
On metal or timber trelliswork, pole wrap can be installed behind the lattice to create a textured screen. While plants are still establishing, the fluting already adds visual interest; once the foliage thickens, light catches between leaves and grooves.
3. Framed balcony screens
On busy streets, balcony railings often don’t provide enough privacy for morning coffee or working on a laptop. Lightweight timber frames, clad on one or both faces with pole wrap, can be positioned in front of existing railings without interfering with the building’s structure.
| Area | Typical goal | Pole wrap role |
|---|---|---|
| Side balcony | Block neighbours’ view | Fluted screen in a timber frame |
| Front porch | Softer street presence | Wrapped posts and partial side panels |
| Roof terrace | Zoning and wind filtering | Low wrapped partitions between seating areas |
Because these frames remain removable in principle, they can often suit rental rules-so long as they don’t modify railings or obstruct escape routes. As local requirements differ, it’s worth checking with building management to avoid problems.
4. Garden arches and small gateways
Lining the inside faces of a timber arch or pergola with slim strips of pole wrap can turn a basic structure into a more intentional threshold. Passing beneath it feels less like walking between two posts and more like entering a defined garden room. With lighting or climbing roses, that sense of arrival can change how the whole outdoor area is perceived.
5. Terrace posts with integrated function
On decking, wrapped posts can be practical as well as attractive. Some people add hooks for hanging chairs, slim wall lights or small fold-down tables into the clad section. The wrap can conceal cable runs and fixings, while the structural post remains untouched.
Think of the cladding as a service zone: somewhere to hide screws, cables and brackets so the underlying frame stays clean and legible.
Choosing the right pole wrap: material, finish and safety
Pole wrap varies widely between products. The thickness, the backing and the timber species all influence both the appearance and how well it lasts.
- Material: real-wood veneer offers the most natural grain, while MDF-based options tend to sand more evenly and accept paint more smoothly.
- Flexibility: thinner sheets wrap tighter around small columns; thicker profiles are often better on flat faces and broad, gentle curves.
- Indoor vs outdoor: many wraps are intended only for dry interior rooms; for exterior use, select moisture-resistant substrates and suitable finishes.
- Fire behaviour: in stairwells or busy escape routes, local rules may limit the addition of combustible cladding.
Adhesive choice matters too. Solvent-based construction adhesives usually grab quickly but can give off strong fumes; water-based alternatives are kinder indoors but may require longer clamping. Preparation is key: remove dust and lightly abrade glossy surfaces so the result feels permanent rather than like a short-lived trend.
How this trend fits into bigger design shifts
The rise of pole wrap aligns with a broader move towards texture over loud pattern. Fluted surfaces are appearing on hotel reception desks, kitchen islands and even bathroom vanity units, as people look for calm finishes that still feel layered and characterful.
It also reflects a preference for reversible, low-disruption upgrades. Many renters and younger homeowners work within limits: structural walls that can’t be moved, building rules that restrict exterior alterations, and budgets that don’t stretch to full refits. Surface-based fixes-like pole wrap, peel-and-stick tiles and plug-in lighting-respond by offering incremental change rather than major renovation.
For beginners, pole wrap sits in an approachable skill bracket. Projects usually need only basic tools, short working times and minimal mess. The visual impact, however, is often large enough to encourage people to attempt more ambitious carpentry once they’ve built confidence.
There are downsides to manage. Veneer marks more easily than solid timber, and deeper grooves can collect dust. In kitchens and bathrooms, moisture from steam or splashes can distort panels that aren’t well sealed. A quick check before you start-moisture, impact risk, fire considerations and landlord rules-helps keep those drawbacks in check and steers the material towards spaces where it performs best.





Comments
No comments yet. Be the first to comment!
Leave a Comment