
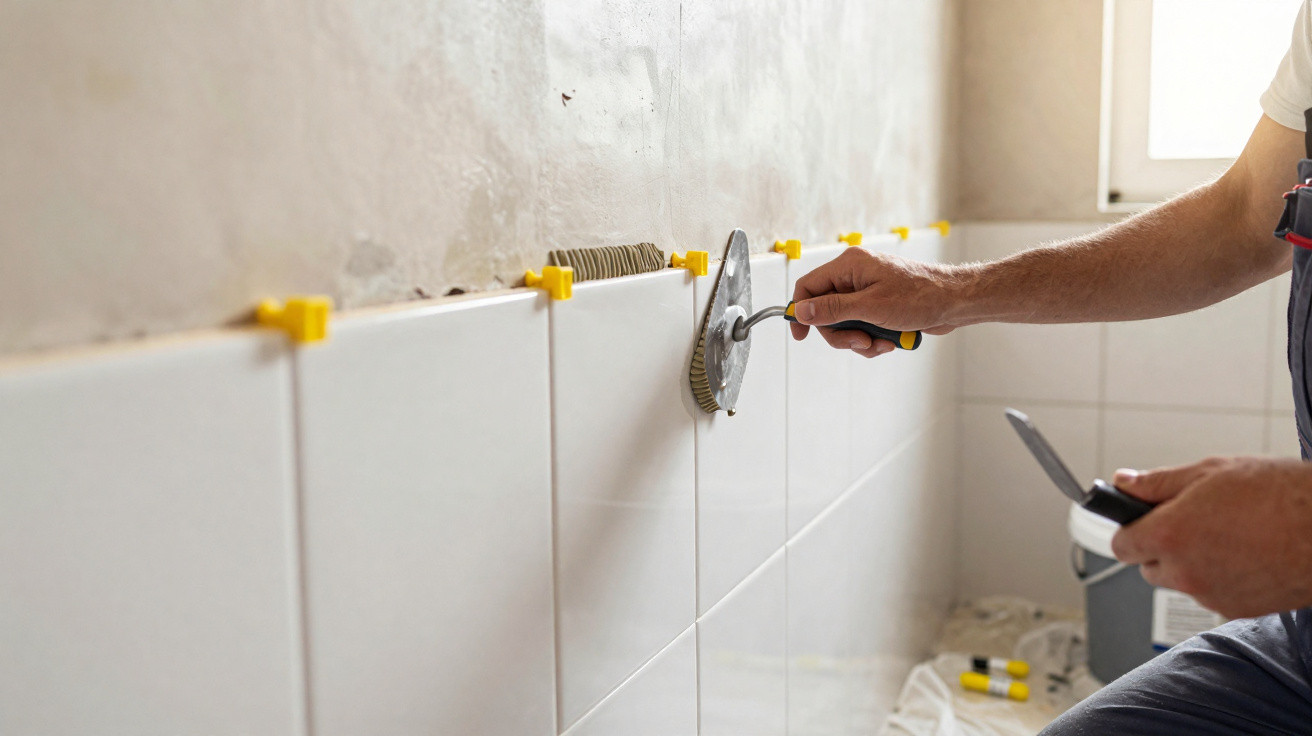
When you’re fixing new tiles to a bathroom or kitchen wall, the same issue often crops up: no sooner are the ceramic tiles in place than they start to creep downwards. Instead of that satisfying before-and-after moment, you’re left battling frustration, wandering grout lines and uneven courses. With the right adhesive, a simple timber batten and a tidy fixing method, you can prevent slipping reliably - even if you’re not a tradesperson.
Why wall tiles slide in the first place
Too runny, too thick, too wet: adhesive is usually the culprit
Most of the time, the tiles aren’t to blame - the tile adhesive is. A common mistake is mixing powdered adhesive “a bit thinner” so it spreads more easily. It sounds helpful, but it’s a recipe for trouble. If the adhesive bed is too wet, it has very little initial grab, and the tile can effectively float on the wall.
Going the other way can cause problems too. If you apply an overly thick layer, you create a heavy, slick bed. Under its own weight and gravity, each tile can slowly settle downwards and the joints start to drift out of line.
"The ideal tile-adhesive consistency is like a mouldable, stable filler: soft but not runny, and it should sit firmly on the trowel."
If you mix the adhesive exactly as the manufacturer specifies, you’ve already dealt with a large part of the problem. It shouldn’t slump off the trowel; it should hold its shape. A quick test dab on the wall makes it obvious whether the mix is right.
Without the right adhesive, any wall becomes a gamble
Another factor that’s often underestimated: not every adhesive suits every surface. For vertical work, a flexible or high-performance tile adhesive with strong initial grab is a sensible choice. In professional terms, you’re looking at a C2-class mortar with extended open time.
What DIYers should look for on the bag:
- A clear note such as “suitable for wall tiles” and high bond strength
- Extended open time (at least 20 minutes working time)
- Explicit approval for bathrooms, showers or kitchens
- Compatibility with the substrate (plaster, plasterboard, existing tiles)
Advice at the DIY store can be useful, but the technical specification on the packaging is the reliable guide. Reading it carefully now saves you from pushing tiles back up and re-aligning later.
The wood batten that stops tiles slipping
Why starting on the second course avoids a lot of headaches
Many people instinctively start on the bottom row, sitting tiles straight on the floor, shower tray or worktop. In practice, that’s where trouble begins. Floors are rarely perfectly level, and old silicone joints or small undulations in the screed get transferred upward without mercy. One uneven starting line can throw the entire wall out.
Professionals avoid this by not starting at the bottom at all - they begin with the second row. That’s where a simple aid comes in: a straight timber batten fixed horizontally to the wall.
"The temporary timber batten creates a perfectly straight reference line - and supports every tile until the adhesive has set."
How the method works:
- Use a spirit level to mark a horizontal line at the height of the second row of tiles.
- Fix a straight length of timber (a batten or sturdy strip) along the line with screws.
- Make sure it won’t bow - choose a more rigid piece of timber if in doubt.
- Your first installed row now sits on the batten, not on an inaccurate floor line.
The batten takes the load and stops any downward movement. Only once all rows above are in place and the adhesive has fully cured should you tackle the bottom row.
Tiles that stay put: the impact of double buttering
The second major defence against sliding tiles is the fixing technique itself. Pros call it “double buttering”: adhesive goes on the wall and on the back of the tile.
A notched trowel with the correct tooth size matters here - typically 6 mm for common tile sizes. Comb the adhesive on both surfaces so you get clean, even ridges.
The key detail is that the ridges run at right angles.
- Wall: comb the ridges horizontally
- Tile: comb the ridges vertically
When you press the tile in firmly, the ridges collapse into each other, air is pushed out, and a suction effect forms. The tile ends up held almost like a suction cup and is far less likely to shift - especially with larger-format tiles.
Spacers and clips: consistent joints without the hassle
Why spacers are more than a DIY gimmick
If you rely purely on judgement by eye, uneven joint widths are almost guaranteed. That looks busy and makes any small movement more noticeable. Traditional plastic cross spacers or modern levelling systems with wedges or clips solve this.
These systems do two things at once:
- They maintain consistent joint widths between all tiles.
- They help prevent individual tiles from settling slightly and creating lipping.
On kitchen walls or in showers with strong lighting, tiny differences stand out immediately. Spending a few pounds on spacers usually results in a much calmer, more uniform finish.
Patience pays: why 24 hours’ rest is non-negotiable
Let it cure first, then fit the bottom row
Once the area above the batten is tiled, it’s tempting to carry on immediately. This is where many DIYers come unstuck right at the end. If you remove the batten too early, the weight of the still-green tiling can pull everything down at once.
"At least a full day’s break - only once the adhesive has completely cured should the support come off."
Most adhesives need around 24 hours to reach their final strength. Only then should you carefully unscrew the batten. The exposed strip on the wall is where the bottom row goes, and that row often involves the most fiddly cutting.
Over baths, shower trays or worktops in particular, the final course is usually the trickiest. Minor floor offsets, falls or uneven edges can be disguised here with accurately cut tiles. Leaving this step until last lets you work to the millimetre without risking the rows you’ve already completed.
Practical extra tips for a finish that looks professionally tiled
Substrate, layout, safety - the bits DIYers often overlook
Before the first dab of mortar goes anywhere near the wall, the surface needs attention. Loose paint, grease, dust or crumbly plaster will ruin adhesion and durability. A bonding primer or deep-penetrating primer helps create a sound, uniform base.
A quick pre-check is worthwhile:
- Tap the wall: repair any hollow-sounding areas.
- Use a long straightedge to find bulges or dips.
- Plan your joints: where will you start, where will cut tiles sit, and where are the main sight lines?
One more thing that’s easy to forget: large tiles are heavy. Wear work gloves, knee pads, and safety glasses when cutting or grinding tiles to avoid injuries. Tile cutters or wet saws should be set up securely and used correctly.
Where the timber-batten trick is worth using
The combination of a timber batten, double buttering and spacers isn’t just for bathrooms. These jobs benefit too:
- Kitchen splashback between the worktop and wall units
- Tiled walls in a utility room
- Half-height tiling behind a basin or WC
- Feature walls with decorative tiles in living areas
In kitchens especially, the batten helps ensure the bottom row later follows the slightly irregular line of the worktop. Small waves or a slight fall are absorbed in the cuts, while the visible grout lines stay crisp and straight.
If you stick to these few key rules, tiling doesn’t have to feel like a test of nerves - it can be a genuinely satisfying project. The wall ends up exactly as intended: straight, orderly and long-lasting, without tiles slowly creeping towards the floor.




Comments
No comments yet. Be the first to comment!
Leave a Comment